Developing modern applications can be a process that involves many steps. Some of these include writing your code, testing, builds, local deployments, persisting your code in a Git repository, running CI/CD jobs, deploying to an environment.
Skaffold attempts to simplify this workflow for developers by gathering all these processes in one place, allowing them to focus on writing code.
Why Skaffold
![]()
Skaffold is an open-source project from Google and has some characteristics that make it attractive for developers.
It’s extremely lightweight, runs everywhere with easy-to-remember skaffold commands, has a lot of features for Kubernetes-native development, and is built with optimized development in mind.
Even more, it enables you to focus on your application development locally while Skaffold continuously deploys to your local or remote Kubernetes cluster.
Detects changes in your source code and handles anything related to build, push, test, and deploy automatically. Can be used effectively as part of your CI/CD process as it provides the building blocks of these pipelines.
Simplicity is considered a core aspect of the project as everything is defined in a single pluggable, declarative configuration for your project, the skaffold.yaml file.
Sounds promising right? Let’s go give it a spin!
Simplify your local development experience with Skaffold
First things first; follow this link to install it according to your environment if you would like to follow along.
To simulate a Kubernetes cluster in order to deploy our demo app I am going to use the Kubernetes mode from Docker Desktop, which provides us a single node cluster.
For the needs of this article, we’ll use a simple go web server as our demo application. You can find all the files used for the demo here.
Our main.go file
package main

import (
	"fmt"
	"log"
	"net/http"
)

func handler(w http.ResponseWriter, req *http.Request) {
	fmt.Fprintf(w, "Testing Skaffold")
}

func main() {
	http.HandleFunc("/", handler)
	log.Fatal(http.ListenAndServe(":8080", nil))
}
Dockerfile
FROM golang:1.15.5

COPY main.go .
RUN go build -o /webserver main.go
CMD ["/webserver"]
Kubernetes simple pod manifest
apiVersion: v1
kind: Pod
metadata:
  name: webserver
  labels:
      name: webserver
spec:
  containers:
  - name: webserver
    image: moustakis/skaffold-demo
and service to expose our web app
apiVersion: v1
kind: Service
metadata:
  name: webserver
spec:
  selector:
    name: webserver
  ports:
  - port: 8080
    targetPort: 8080
  type: LoadBalancer
At this stage, since we have our source code, Dockerfile and k8s manifests we can ask skaffold to generate a simple config for us to get started. Simple run skaffold init at the root of the project directory.
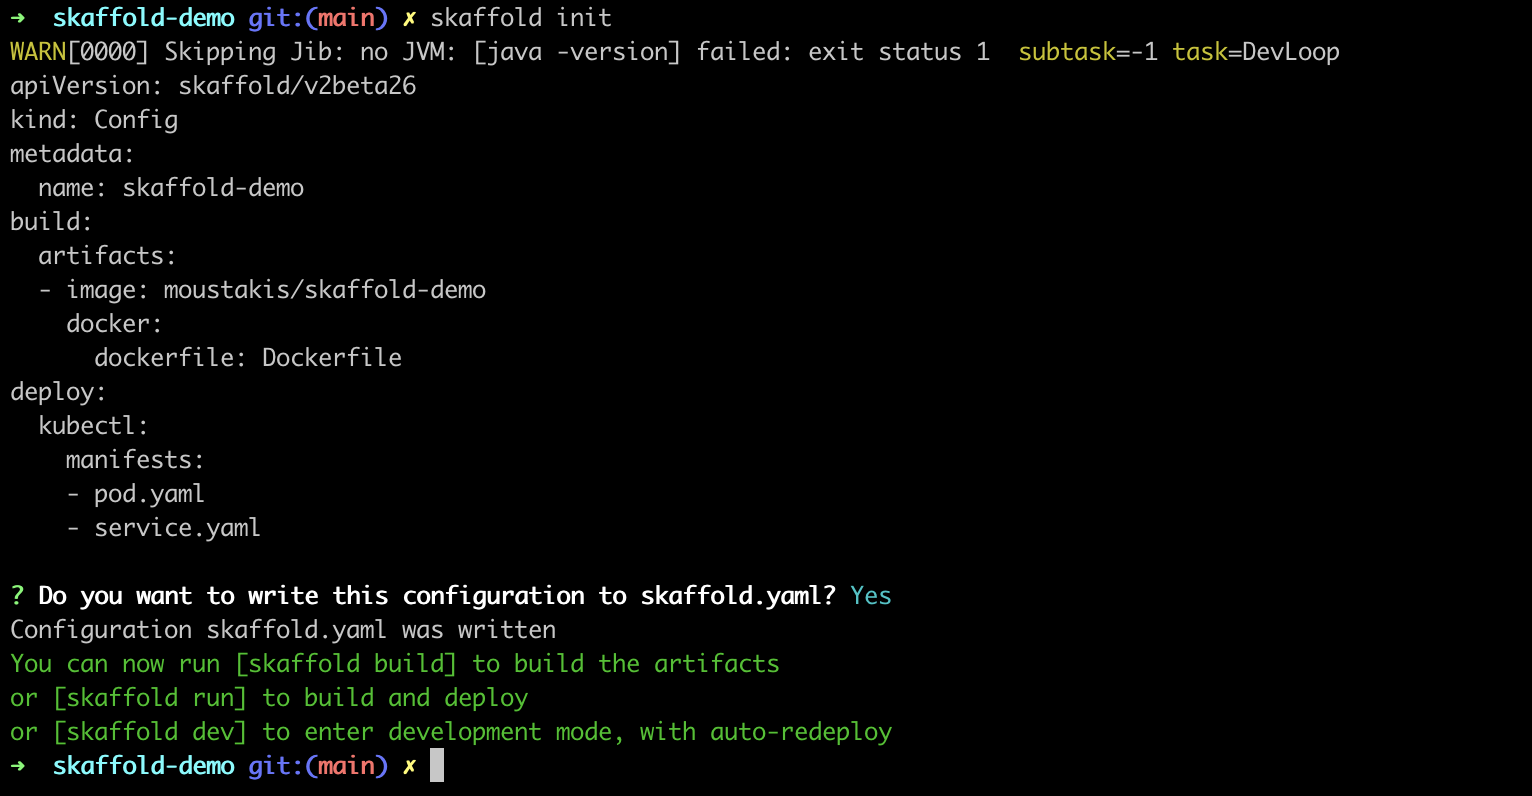
Amazing! skaffold.yaml has been created and our k8s manifests and image name were automatically filled for us.
We are ready to try the continuous development flow of skaffold by running skaffold dev next. During dev mode, Skaffold will watch for source file changes, and when it detects them, will rebuild & push your images, test built images, and redeploy the application to your cluster.
skaffold dev is considered Skaffold’s main mode of operation for development, as it allows us to work continuously while iterating our application.
Without any further modifications to the config file, we expect skaffold to build locally our docker image and deploy it to our local k8s cluster.
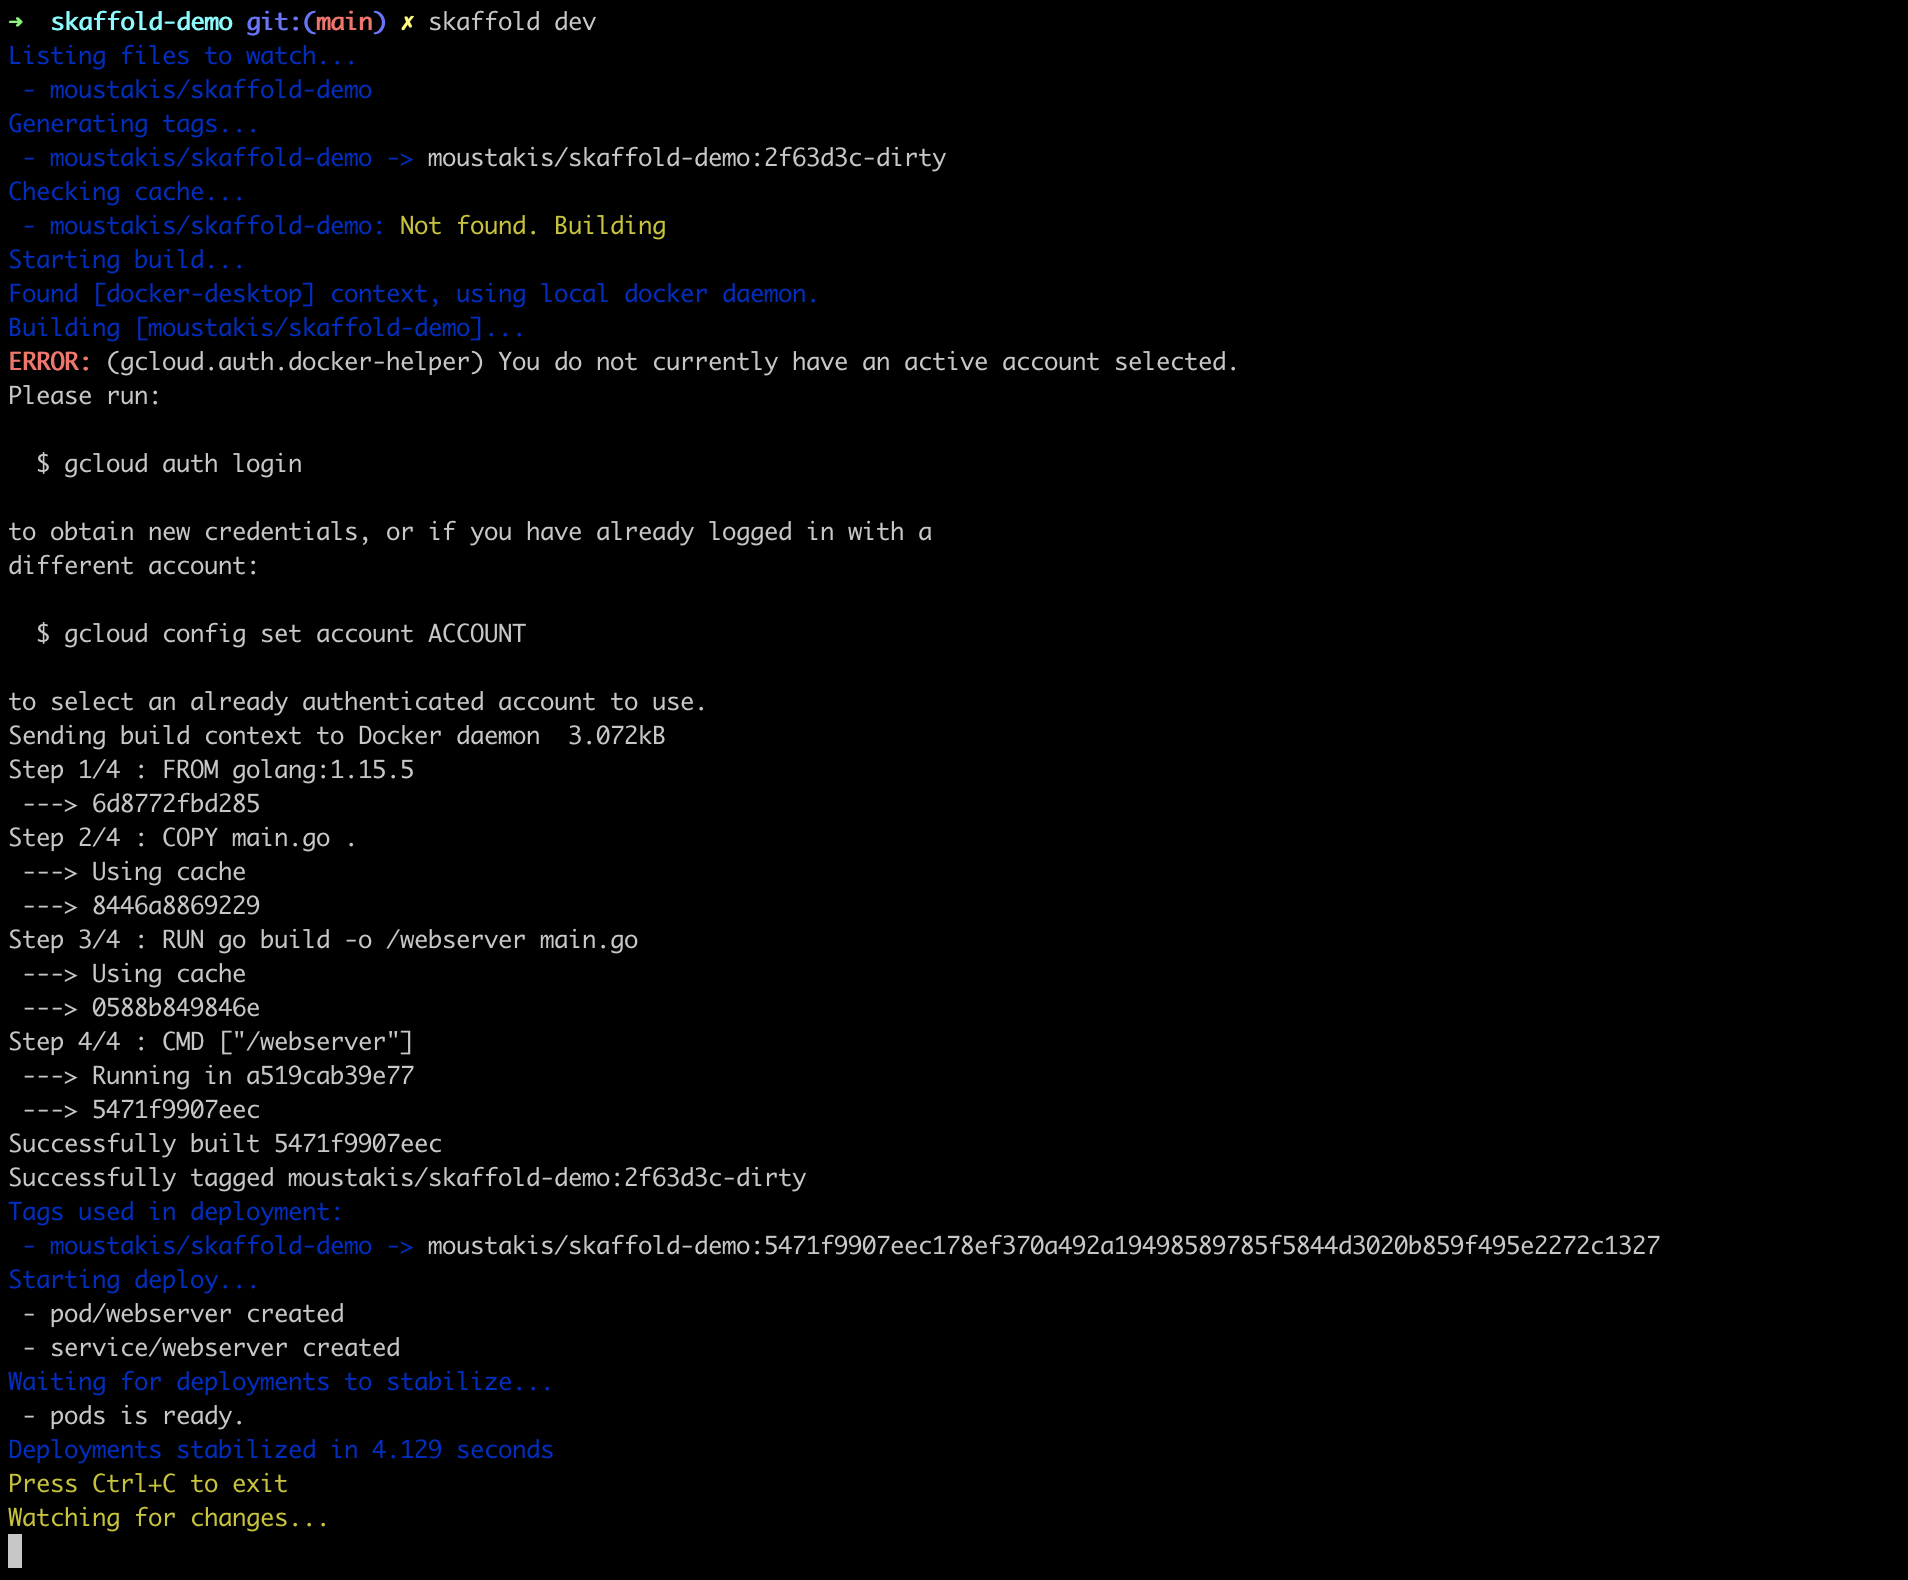
Super! We already see from the command output that our image was built successfully and the k8s manifests seem to have been deployed. Let’s verify.
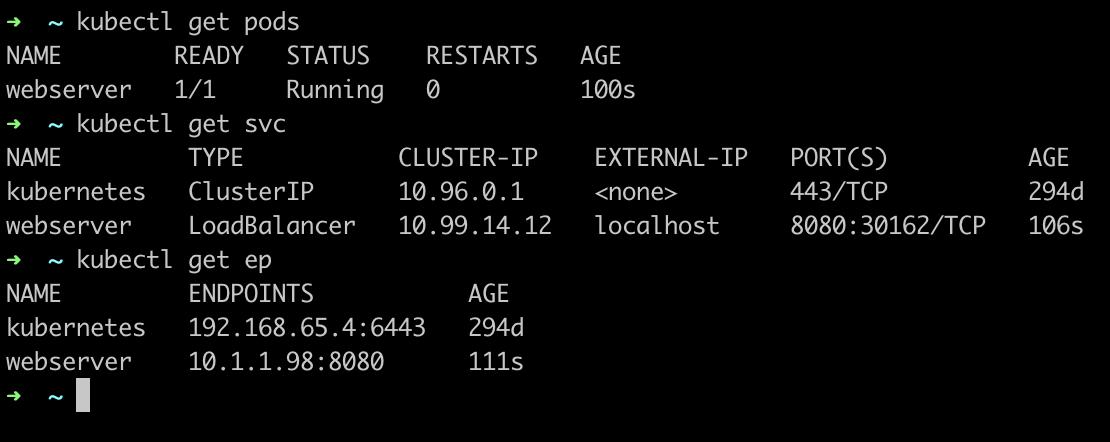
Time to check our web server.
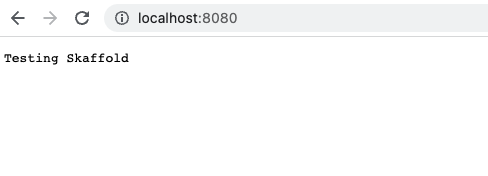
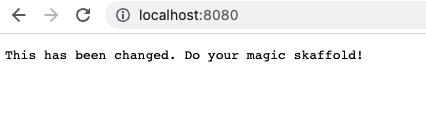
Great success, that was extremely easy. What happens if we modify our source code and hit save?
In our main.go file I will change the message as shown below to test the continuous development process.

The moment we hit save, we notice skaffold picked up the changes and reruns the whole flow. After refreshing the browser and we have the updated message, sweet!
Something to note here is that the behavior of skaffold in these cases is always predictable as the actions have certain precedence over one another.
- File sync
- Build
- Test
- Deploy
You might prefer to trigger the flow yourself. In this case, skaffold run is your friend. Skaffold will perform the workflow described in skaffold.yaml exactly once.
For debugging purposes try skaffold debug. This mode configures specific containers for debugging in pods per the container’s runtime technology. Check this page for more information about how the debug mode works.
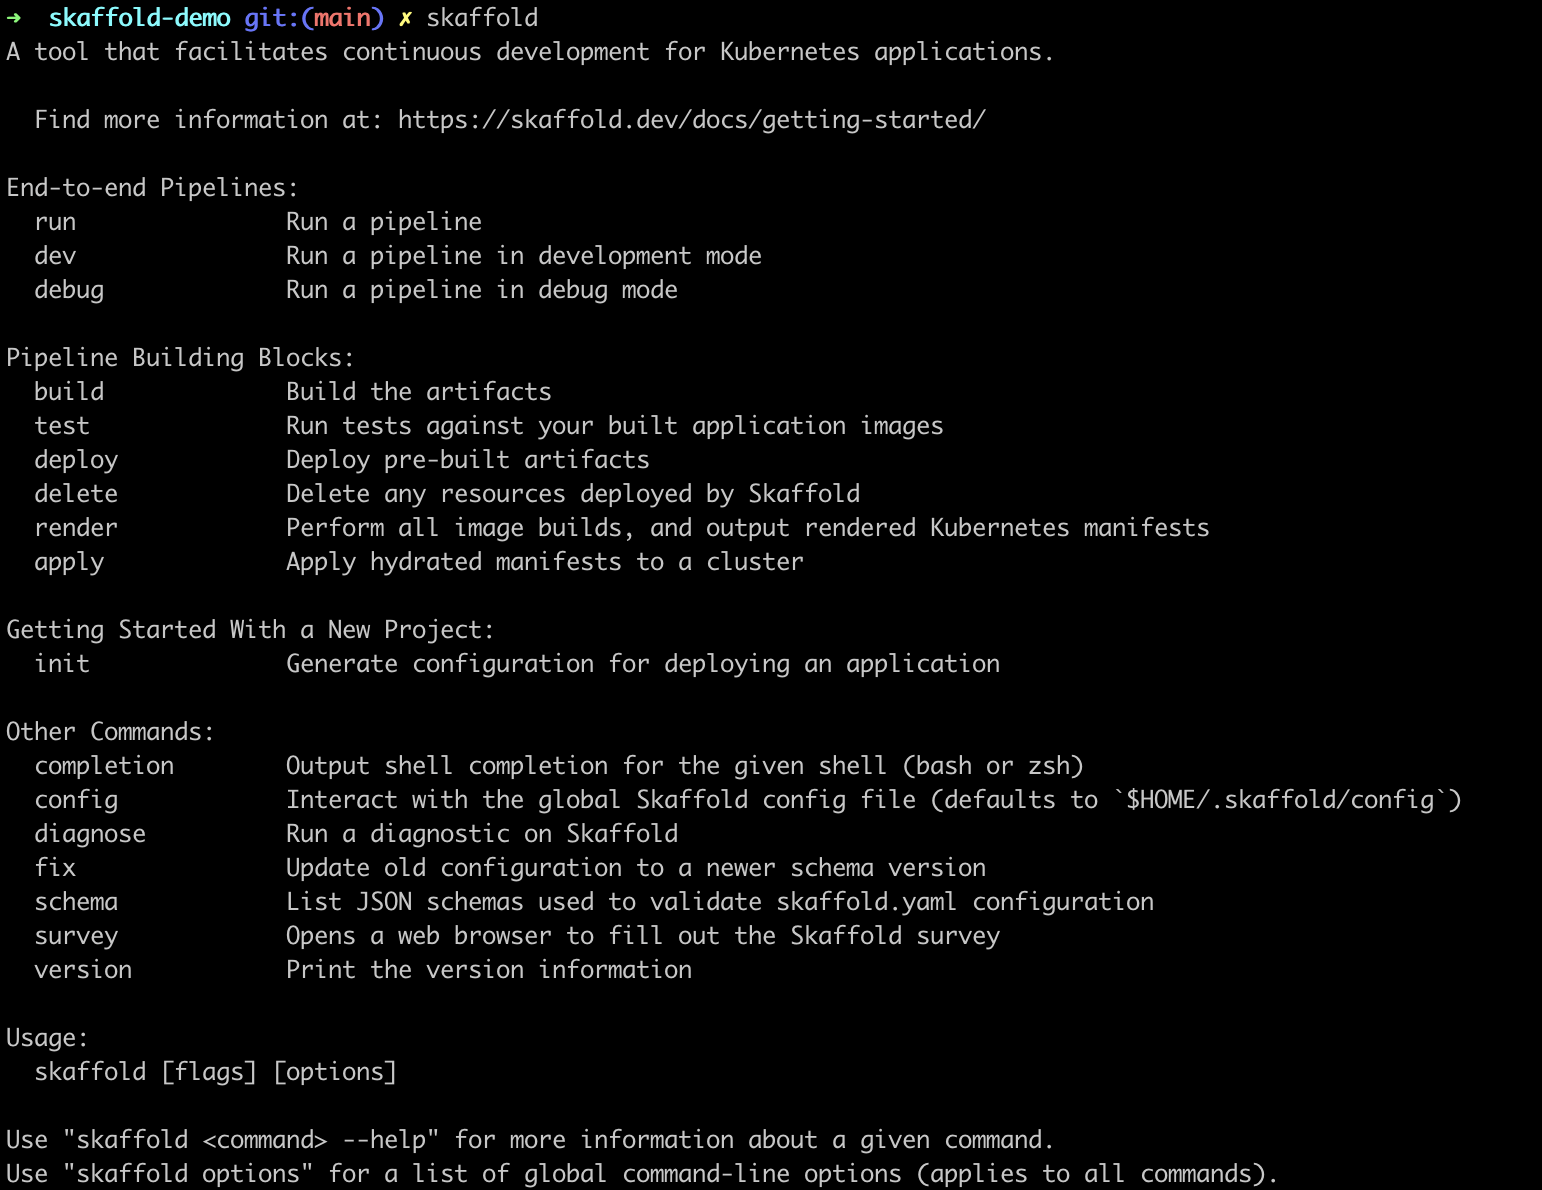
To get an overview of all possible commands simply type skaffold on your terminal.
For detailed information around all the possible configuration options of skaffold.yaml check this page.
Architecture Design and Pipeline Stages
The chain of actions that Skaffold performs can be shown in this picture:
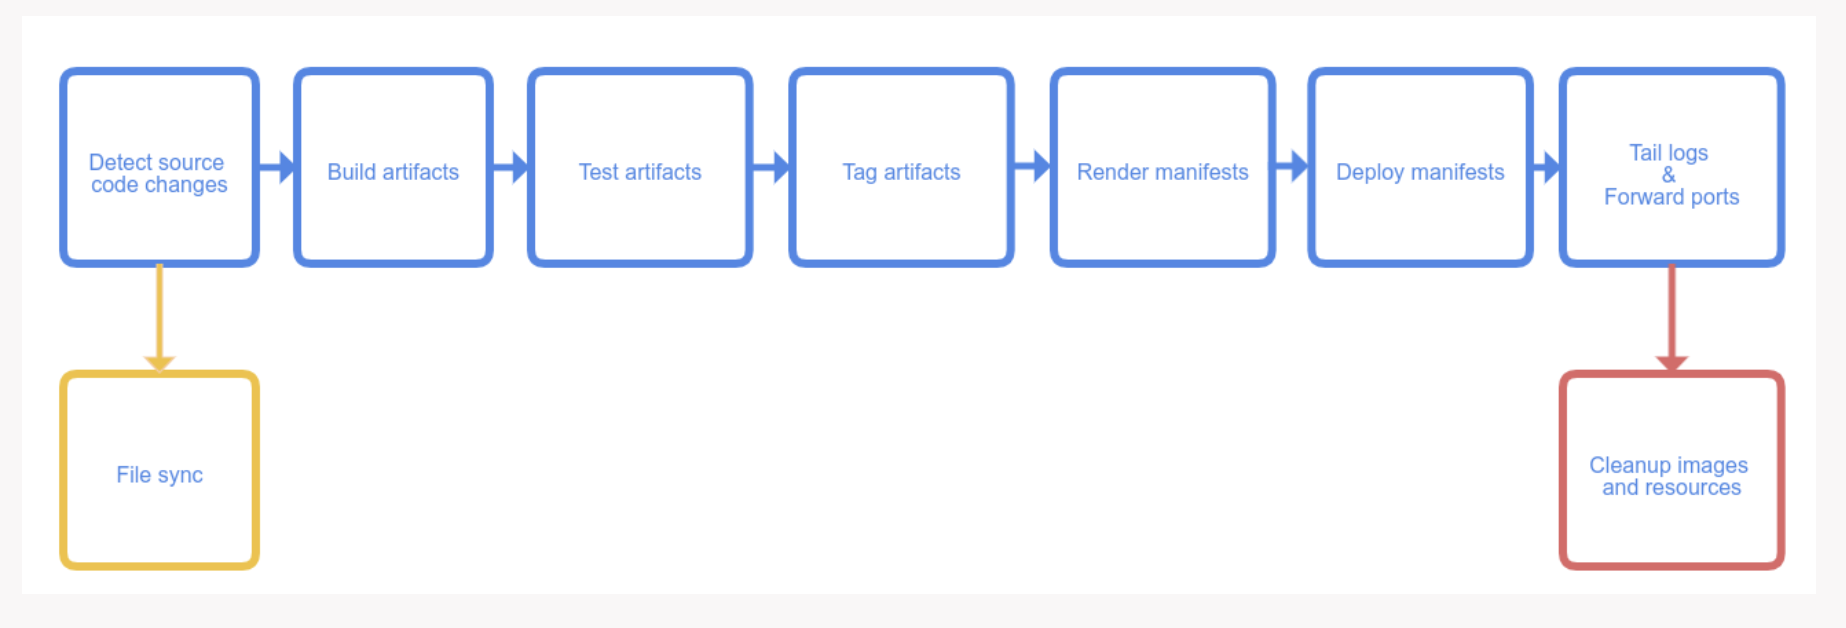
A great feature of Skaffold is that it’s designed with pluggability and customizability in mind. You can modify the workflow according to your needs, skip stages, pick your favorite tools for each stage.
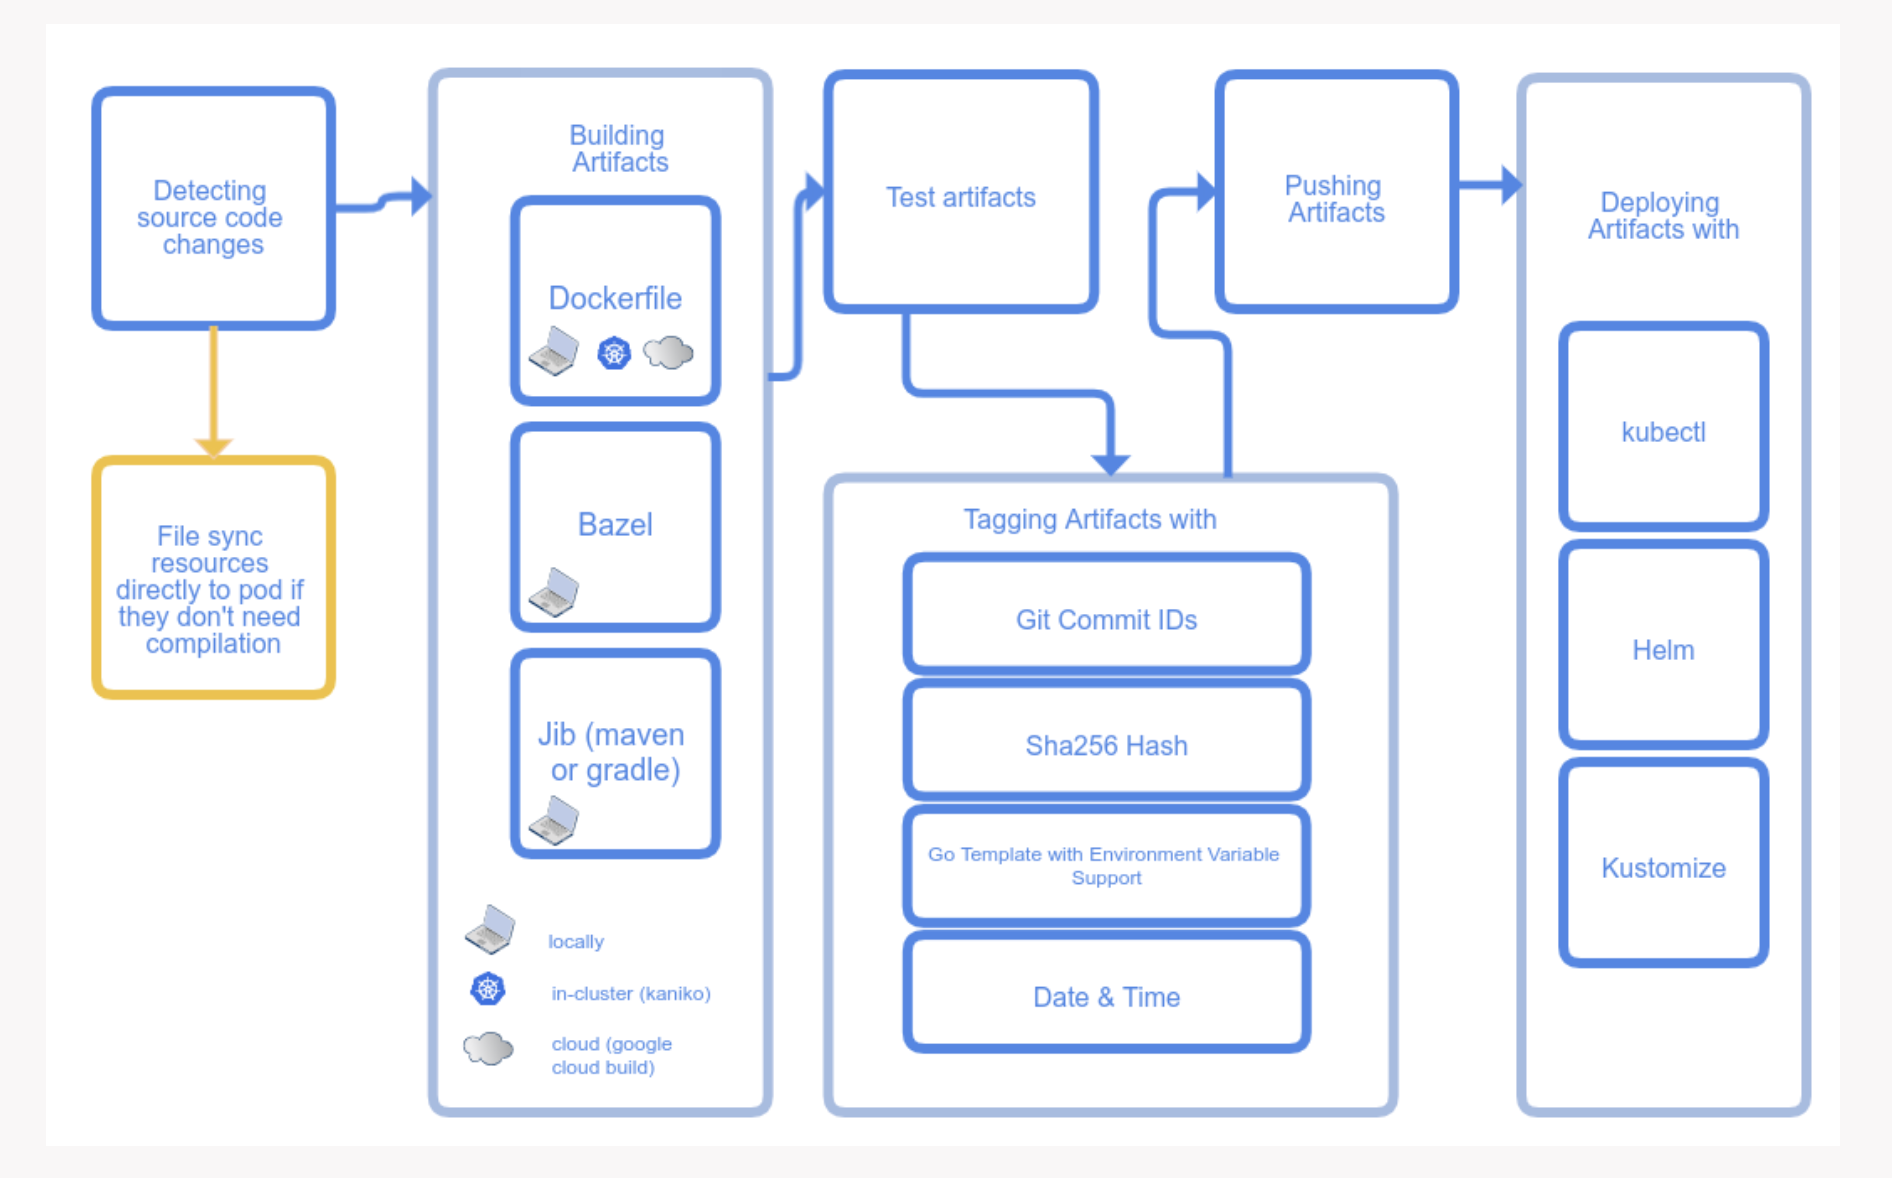
Check this image for different combinations of tools that you can use for each stage.
That’s all folks, hope you enjoyed this. We explored skaffold, a tool that facilitates continuous development and promises to make our development workflows easier.