Introduction
In this article, we are going to create an AWS Lambda function via a custom Docker image and then learn how we can invoke this function from Slack. Running your Lambda functions from Slack can be super handy because it allows you to run your code or tasks without leaving Slack and show the results to all members of this channel.
A typical use case that I can think of would be reporting or updating something or even automate some boring tasks. To follow along you will need an AWS account, a Slack workspace, and a dedicated channel.
Plan
Ok, let’s get to it. For our example, we are going to use some python code that queries the API:
https://cat-fact.herokuapp.com.
This API can be used to retrieve a random animal quote, you can find the documentation here.We are going to use it to retrieve random facts about dogs.
After we have our simple python script that retrieves and displays a random dog quote, we are going to create a Dockerfile for our Lambda, test locally that it functions as expected, build the Docker Image, push it to AWS Elastic Container Registry(ECR), deploy our Lambda, connect a Slack channel with AWS via AWS Chatbot and finally invoke our Lambda via Slack!
It’s going to be an interesting trip as we are going to touch and connect different AWS services on the go.
Our Python script
Our simplistic python script has only one goal, fetch a random dog fact and display it to us. You can find more info here regarding creating Container images for AWS Lambda. In our case, we name our function handler, the default function name for AWS Lambda.
dog-fact-api.py
import requests

def handler(event, context):
    base_url = "https://cat-fact.herokuapp.com"
    facts = "/facts/random?animal_type=dog&amount=1"

    first_response = requests.get(base_url+facts)
    response_list=first_response.json()

    print(response_list['text'])
    return response_list['text']
Dockerize it
Next, let’s use our python code along with a Dockerfile to generate a Docker image. We are going to start from an image specifically created for AWS Lambda functions. Simply setting up and executing our function.
Dockerfile
FROM public.ecr.aws/lambda/python:3.8

RUN pip install requests

COPY dog-fact-api.py ./

CMD ["dog-fact-api.handler"]
Ok, let’s build our image and test that it works as expected. Use the below commands to build the image, run a container from the newly created Docker image and finally use curl to validate that indeed we get back a random dog quote.
docker build -t dog-fact-docker-lambda .
docker run -d -p 8080:8080 dog-fact-docker-lambda
docker ps
curl -XPOST "http://localhost:8080/2015-03-31/functions/function/invocations" -d '{"payload":"testing_lamba"}'

Perfect! There are hundreds of different breeds of dogs. is our quote, works like a charm. Let’s move to push this image to AWS ECR.
Push to AWS Elastic Container Registry(ECR)
In order to use our newly created Docker image, we have to push it to ECR. Let’s create a new ECR repository for this purpose first. I am assuming you already have AWS CLI set up, if not check this.
aws ecr create-repository --repository-name dog-fact-docker-lambda --profile personal --region us-east-2
Let’s go to AWS console and validate that we have created our repository.
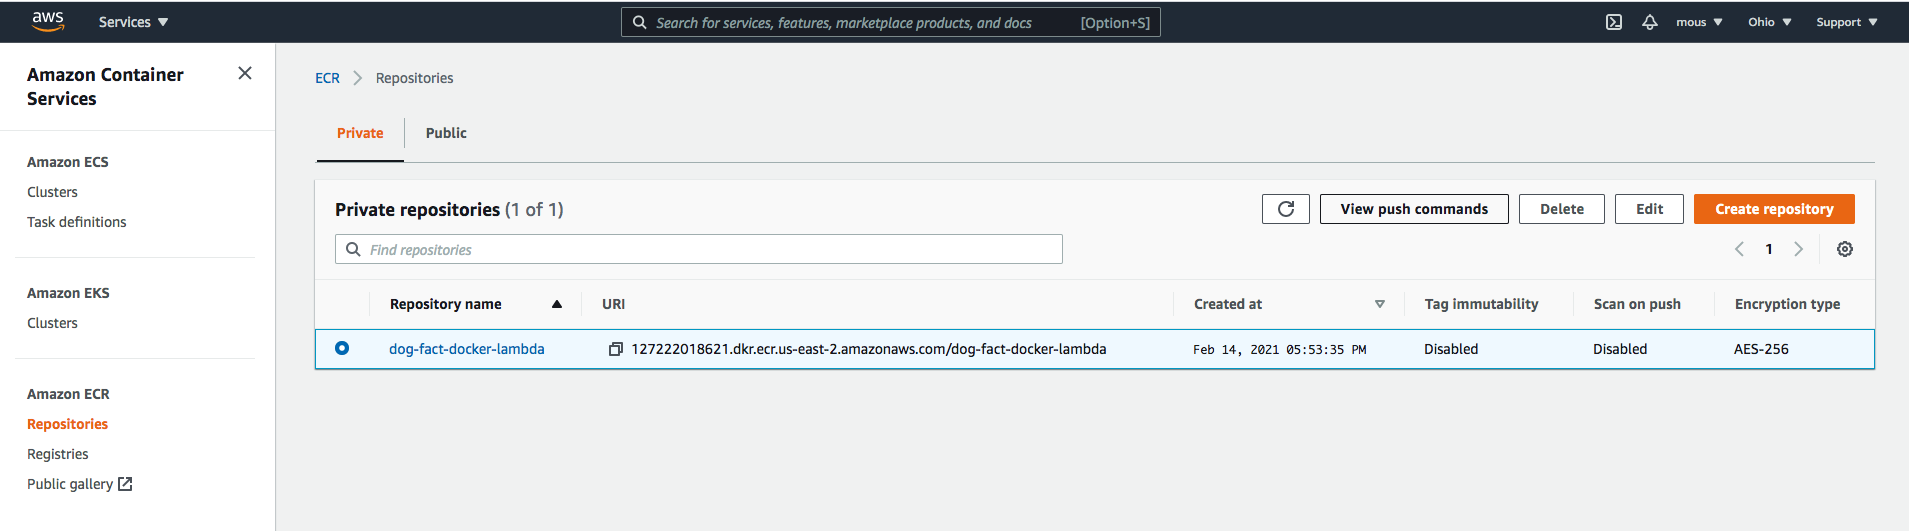
Ok, our repository is there, let’s figure out how we can push our local image there. For this, click the option View push commands.
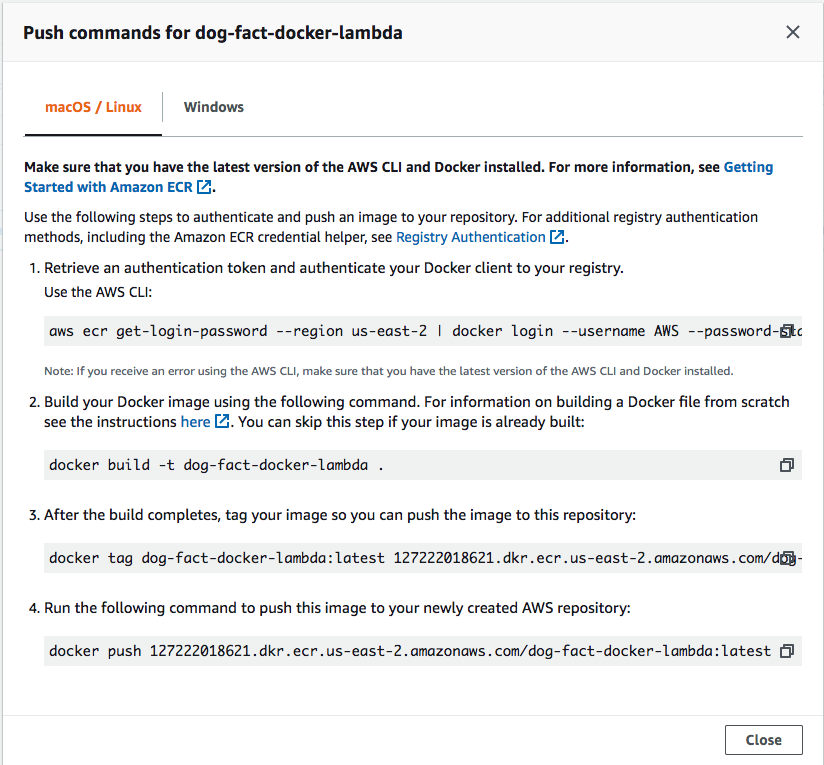
Nice, we have all the instructions we need there. Connect to ECR, tag our image, and push.
aws ecr get-login-password --region us-east-2 --profile personal | docker login --username AWS --password-stdin 127222018621.dkr.ecr.us-east-2.amazonaws.com
docker tag dog-fact-docker-lambda:latest 127222018621.dkr.ecr.us-east-2.amazonaws.com/dog-fact-docker-lambda:latest
docker push 127222018621.dkr.ecr.us-east-2.amazonaws.com/dog-fact-docker-lambda:latest
You should see a Login succeed message after the first command.

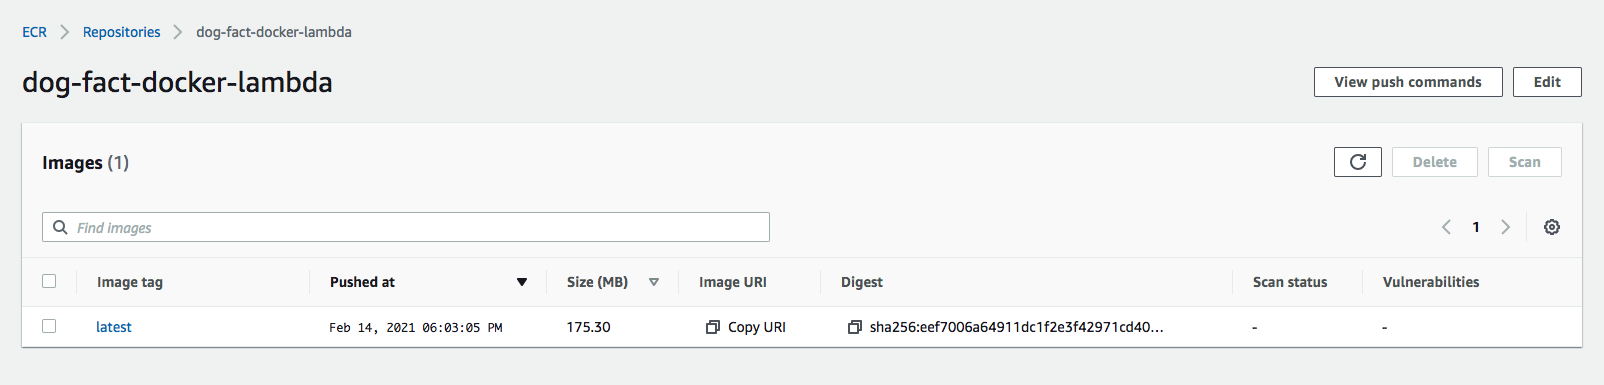
We have stored our Docker image in our repository as shown below.
Set up Lambda with a Container Image
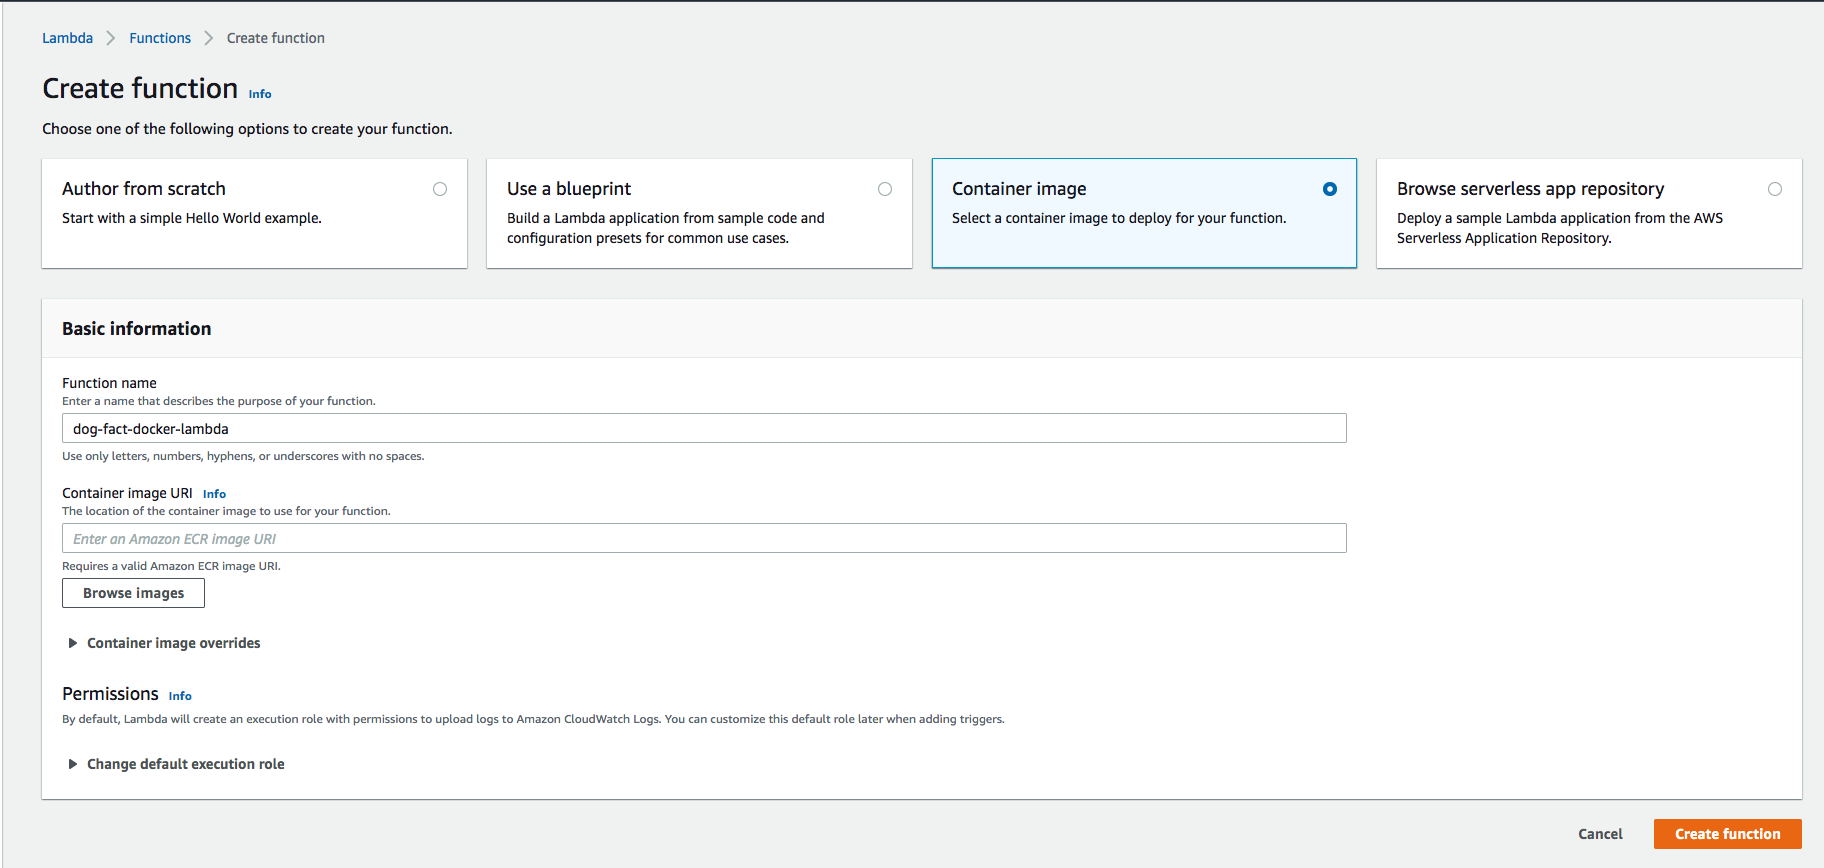
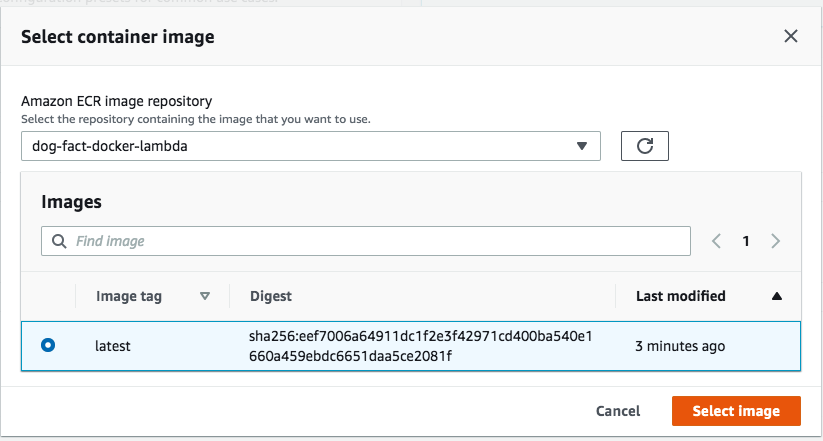
Now we are ready to set up our Lambda function. Navigate to AWS Lambda functions via the console and select Create function. On the next screen select the option Container Image, pick a name and click Browse Images to configure our image.
On the next pop-up window choose our repository and image and go ahead to create the function.
On the initial page of our Lambda function, we see the sections Image and Image Configuration where we normally have our Code configuration. We aren’t going to change anything there in this example.

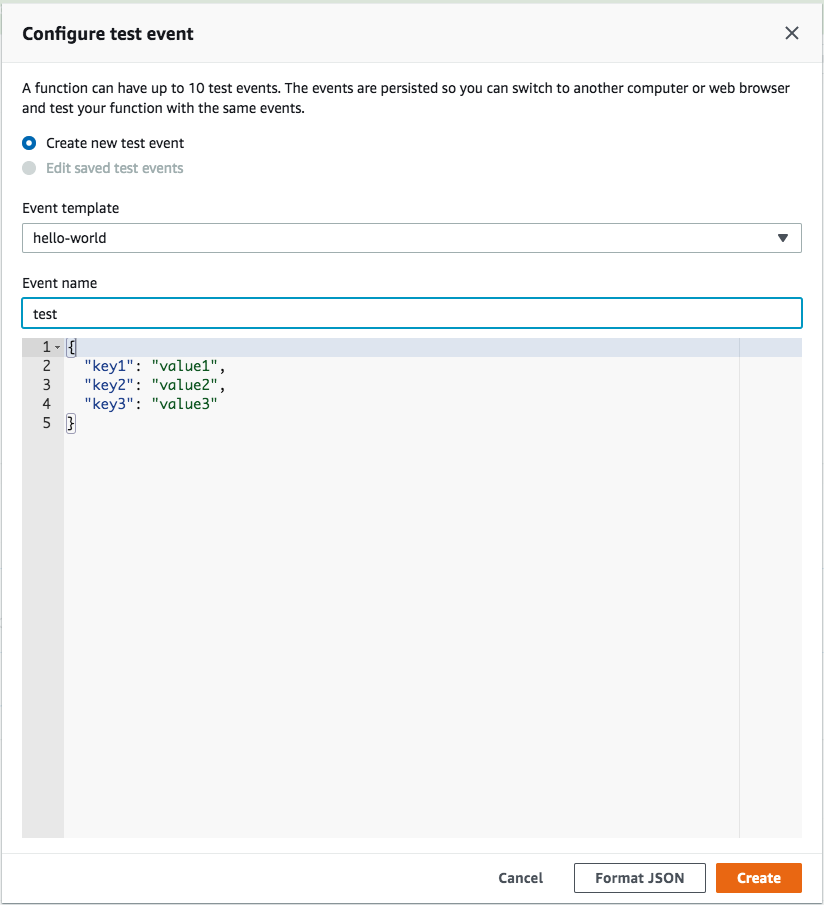
Let’s test our Lambda function first. Configure a new test event(the parameters aren’t important in our case) and select Test.
From the logs, we validate that we get a random dog quote.
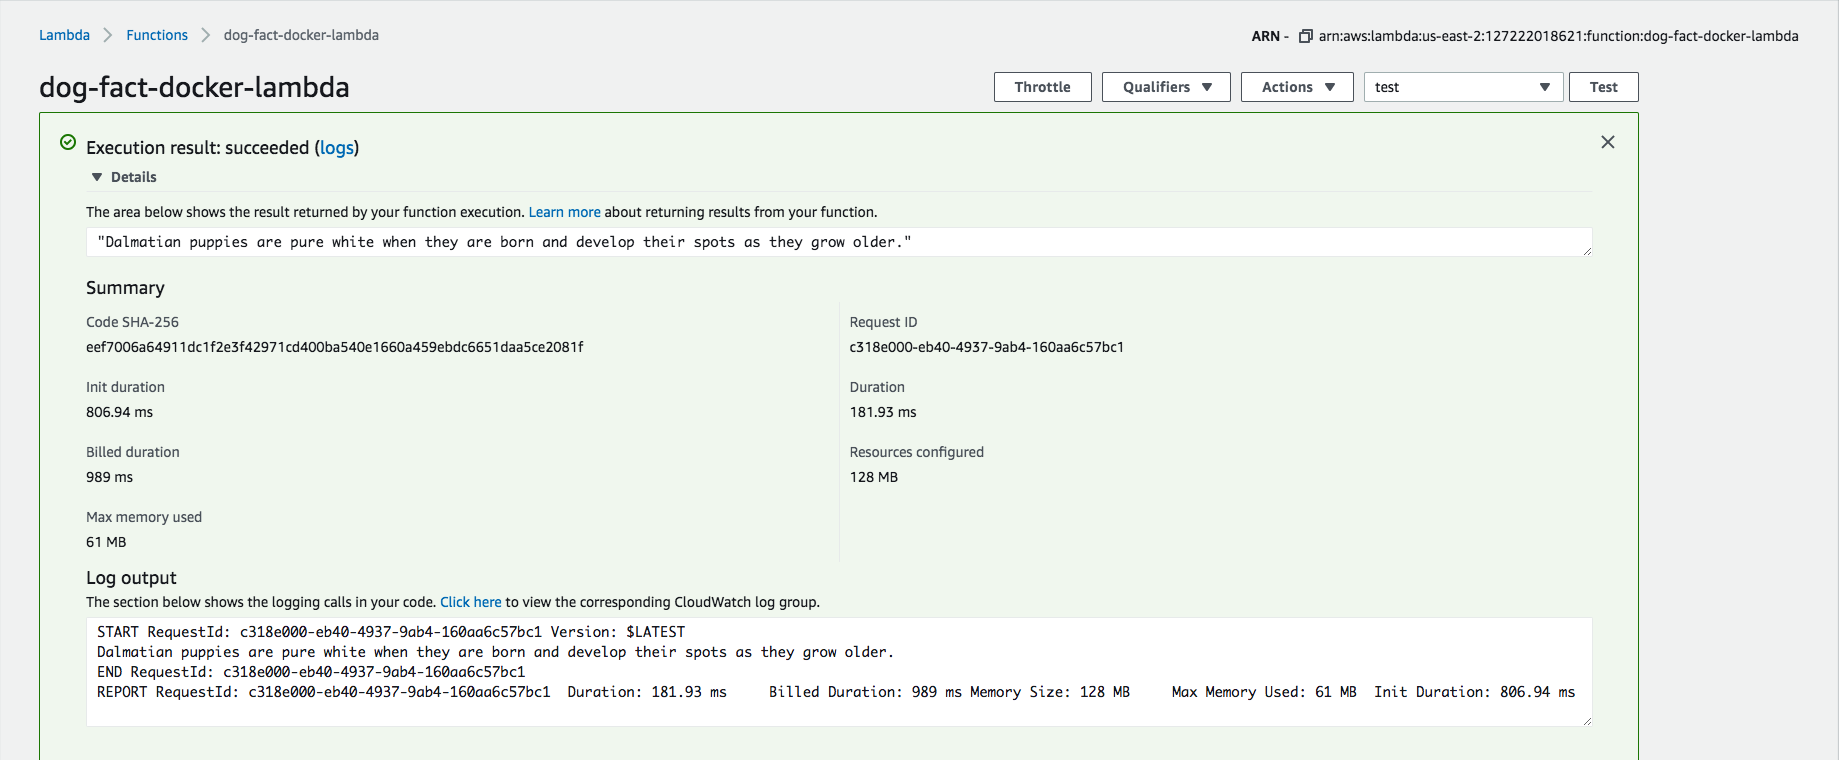
Dalmatian puppies are pure white when they are born and develop their spots as they grow older. Huh, didn’t know that.
AWS Slackbot + Slack
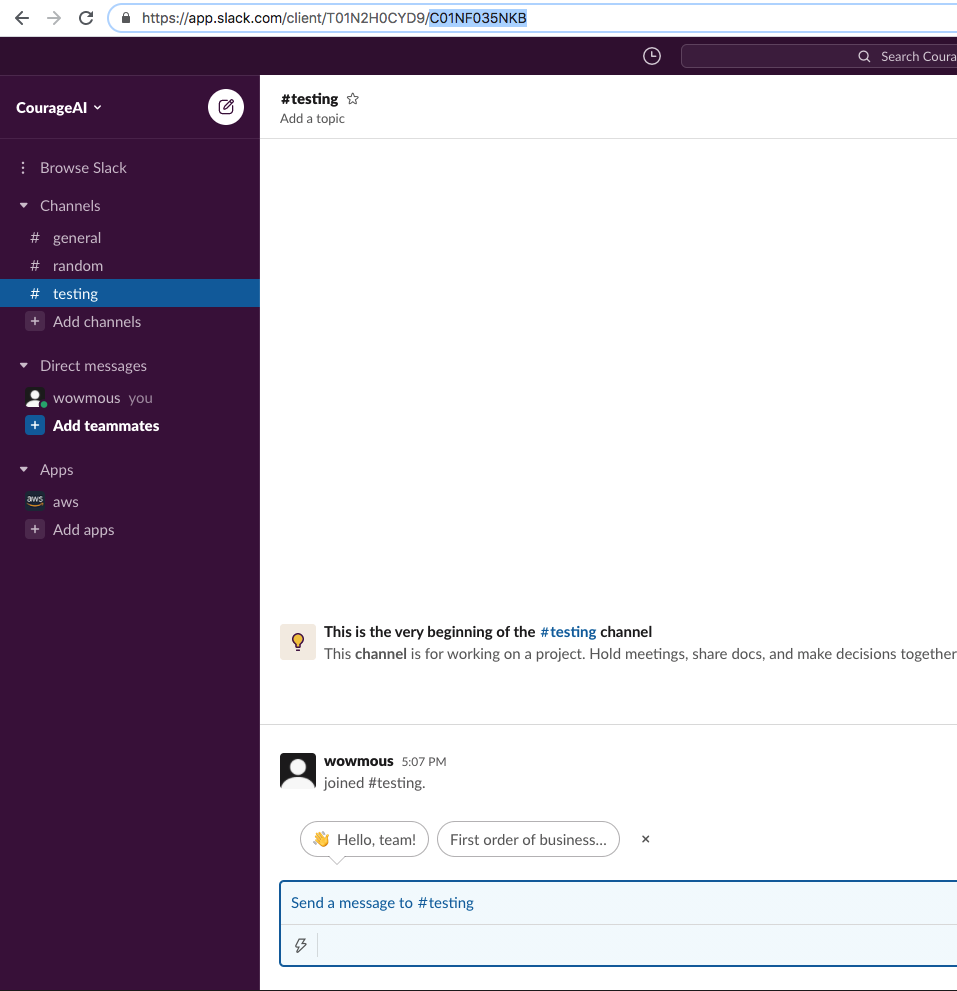
Our function is ready so now we have to connect our slack channel with AWS with the help of Chatbot. Let’s create a new testing channel in our Slack workspace.
Next, from AWS web console navigate to AWS Chatbot and select Slack under Configure client.
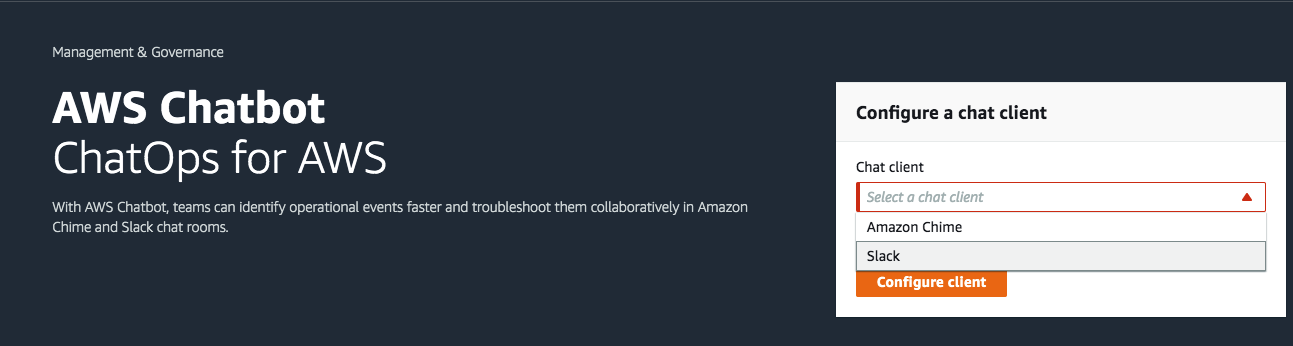
If you are logged in to Slack in your browser your workspace will be automatically picked up and you just have to allow the connection. If you have multiple workspaces, you can select which one to connect to on the top-right drop-down.
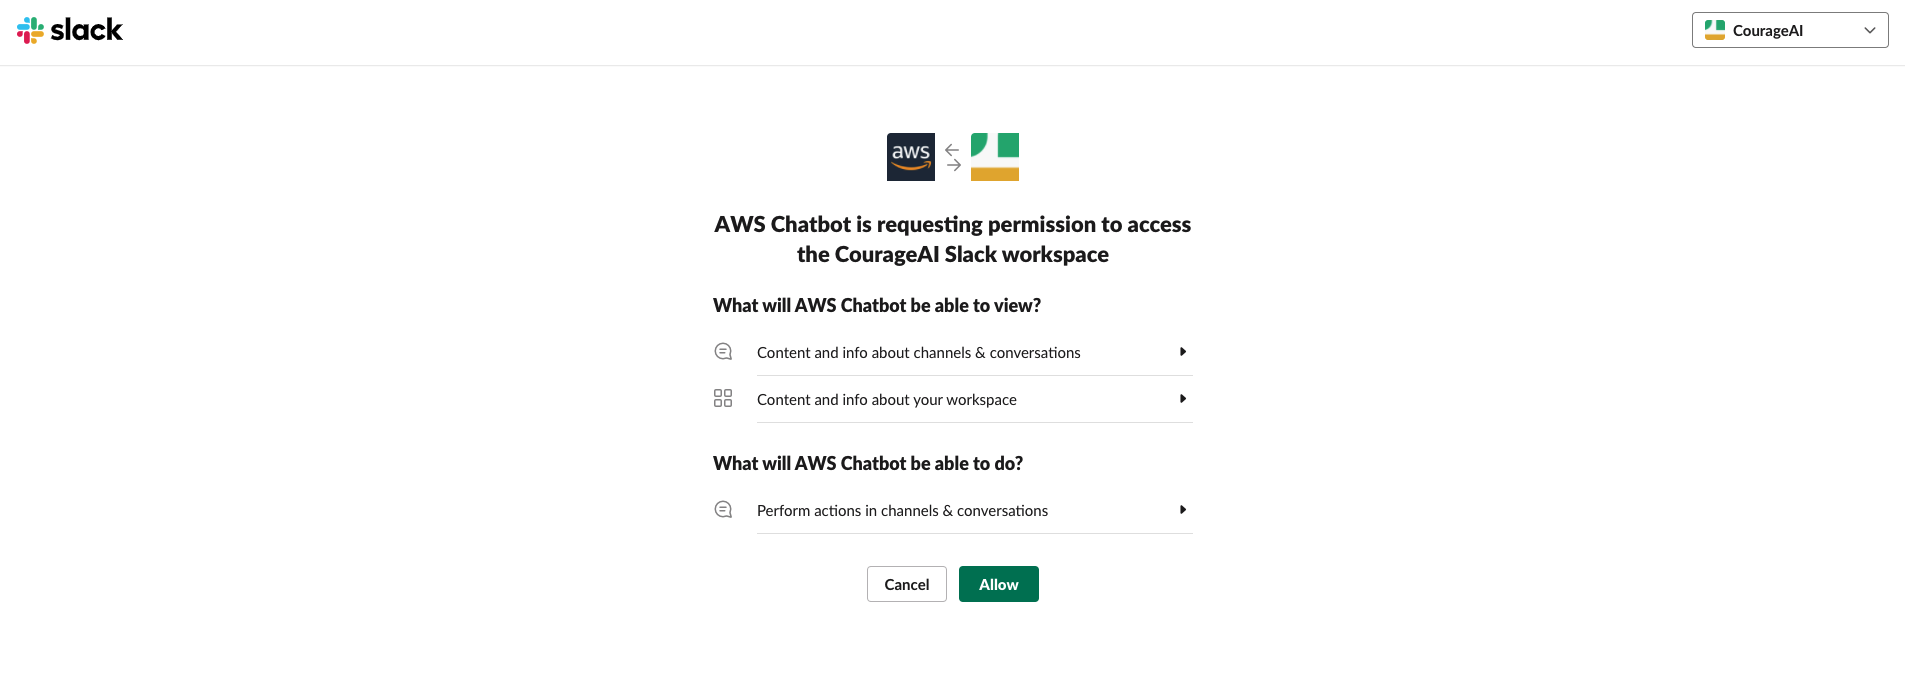
Perfect, our Slack workspace is connected to AWS Chatbot.

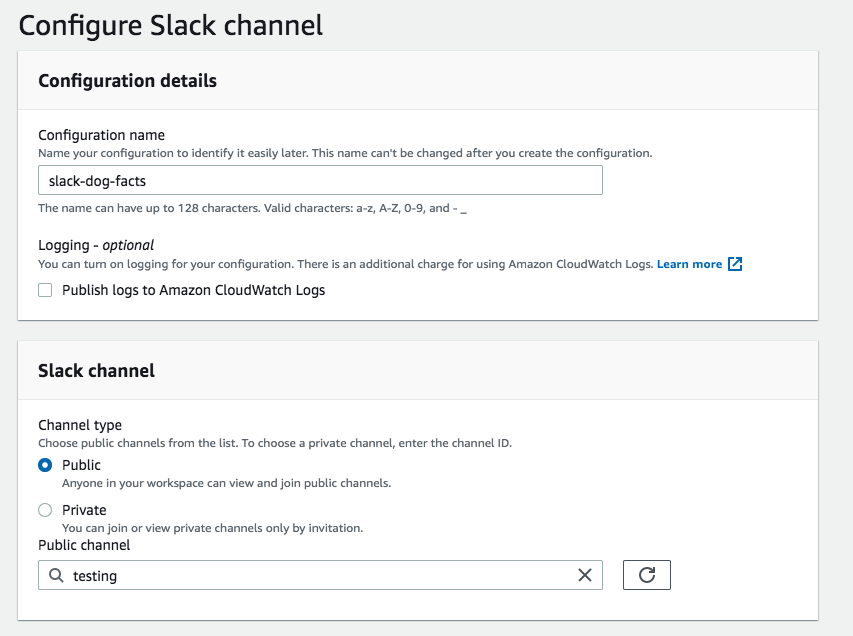
Let’s go ahead and Configure new channel.
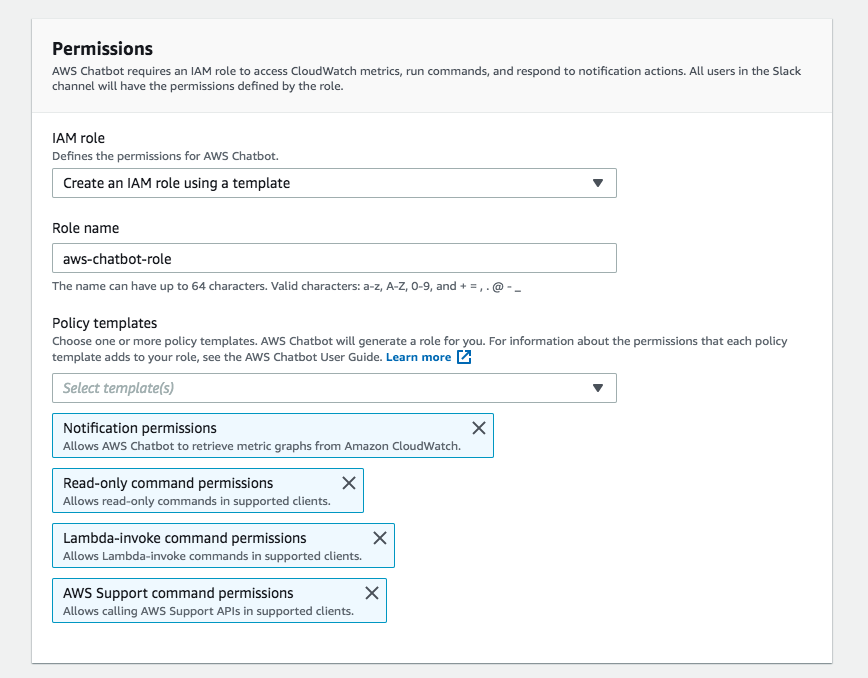
Create a new role for this and add the permissions as shown, We need at least Lambda-invoke command permissions for our example and we are ready.
Invoke Lambda function from Slack
Finally, we are ready to complete this walkthrough. In our testing slack channel go ahead and type:
/invite @aws

Ok, we invited our bot, let’s validate it works, type:
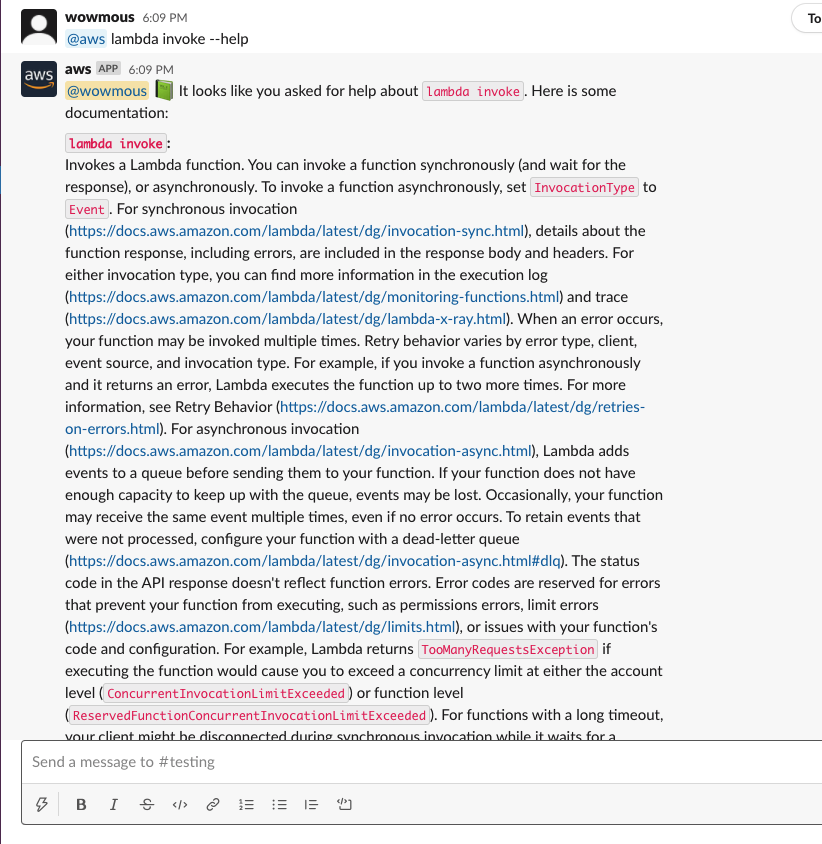
@aws help

Nice, our bot is quite verbose and showing us different examples on how to use it. We can create a support ticket, get information regarding services or perform some operations.
Next, let’s ask for some help on how to invoke our lambda:
Amazing, finally we can call our Lambda from Slack! Select the correct region and click Yes on the prompt.
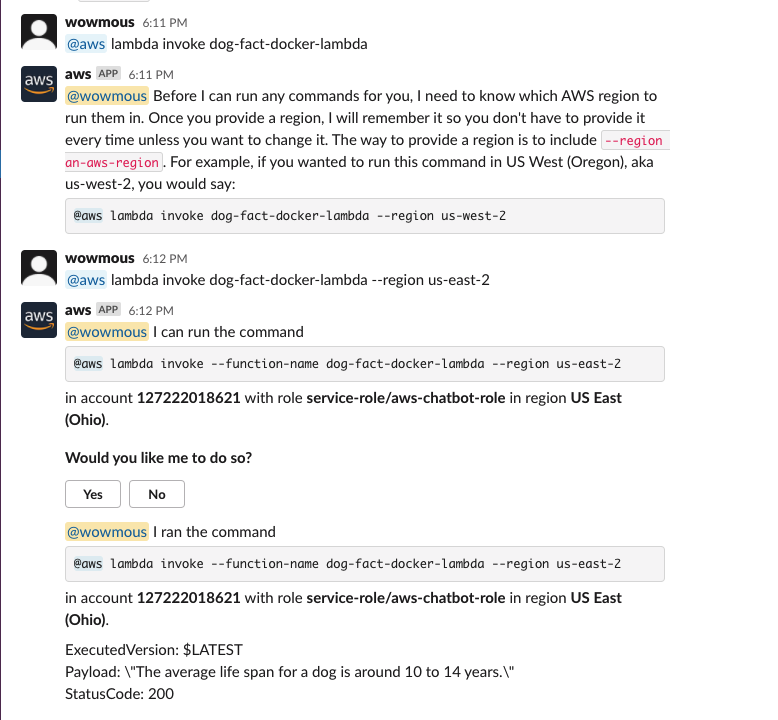
And we are all set!
We get back our random dog quote: The average life span for a dog is around 10 to 14 years.
That’s all folks, hope you enjoyed this. We explored and connected different AWS services and finally, we managed to invoke our Dockerized Lambda via Slack!