Introduction
HashiCorp Cloud Platform (HCP) is a fully managed platform offering HashiCorp products as a service to automate infrastructure on any cloud.
Currently, HCP offers Vault in BETA so we can use this to set it up quickly and get immediate access to Vault’s best-in-class secrets management and encryption capabilities.
Using the Cloud Platform we can benefit from Vault’s resilience and operational excellence without the burden of managing Vault ourselves.
Create a Vault Cluster on HCP
Step number one, you need to create an HCP account. They have a nice integration with GitHub so you can use your GitHub account to connect without creating a new account on HCP.
On first login HCP even offers us a 20$ credit balance to start playing around in the platform, nice!
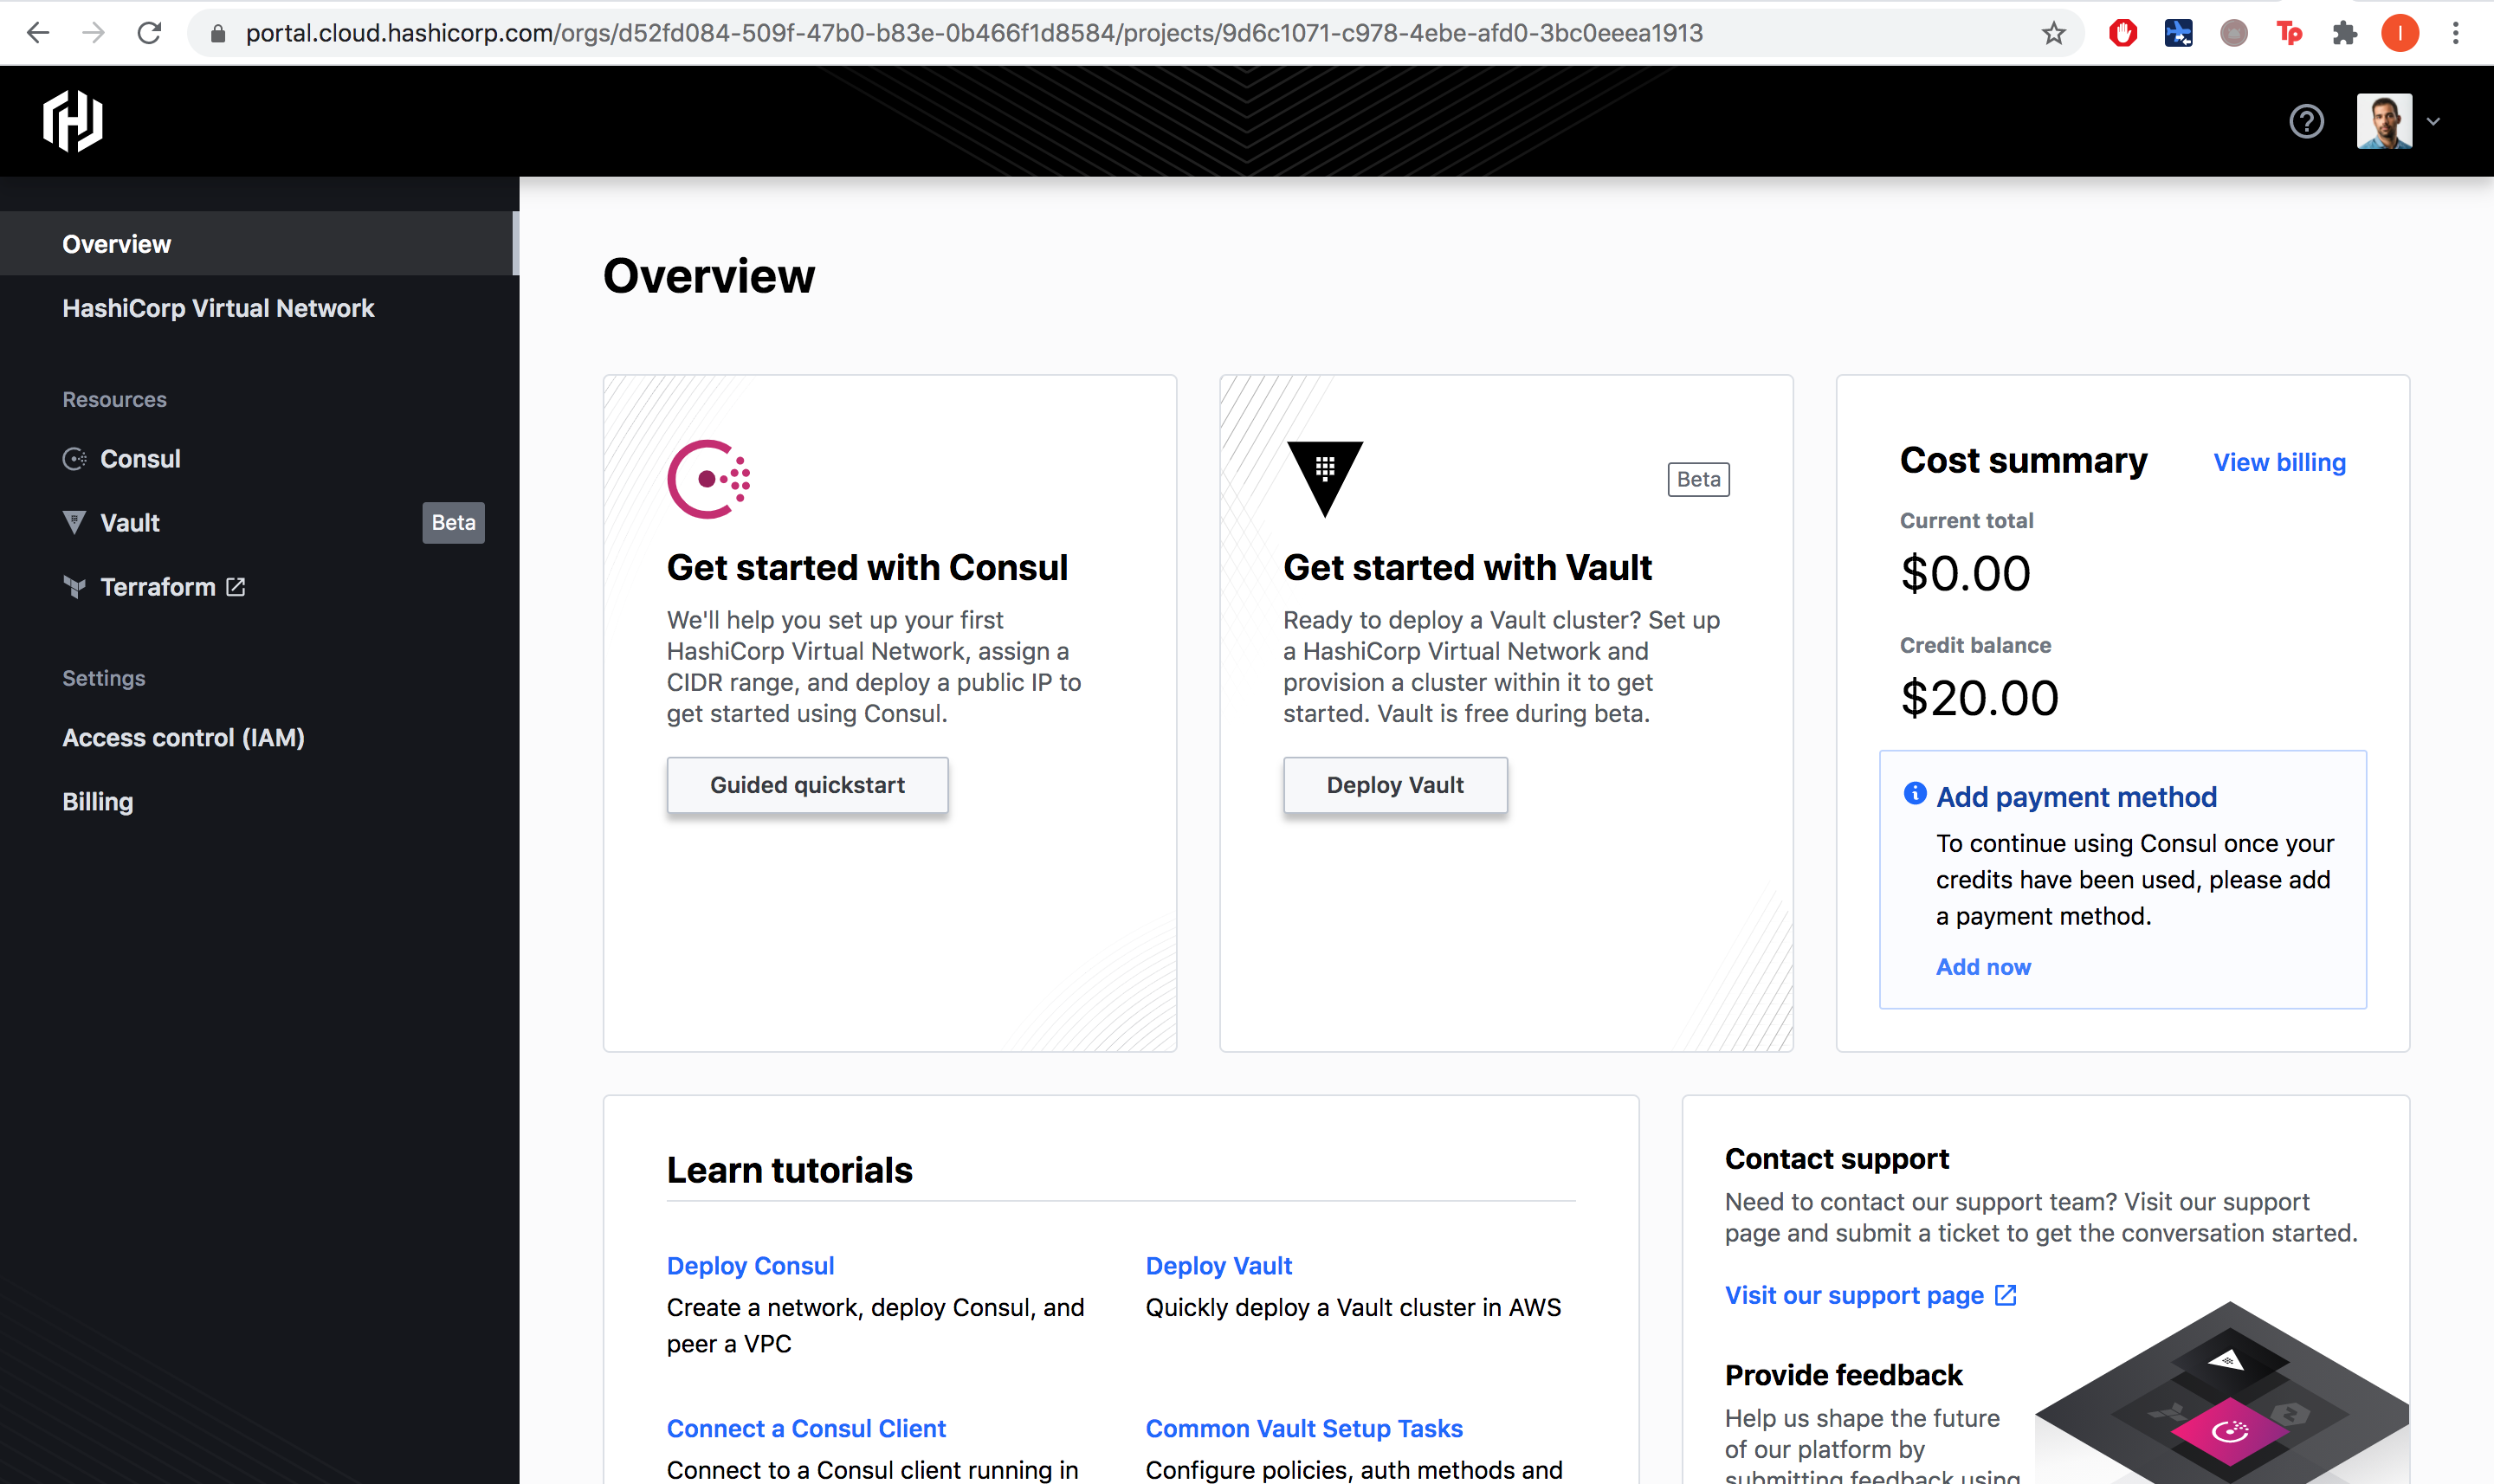
Let’s go and select Deploy Vault.
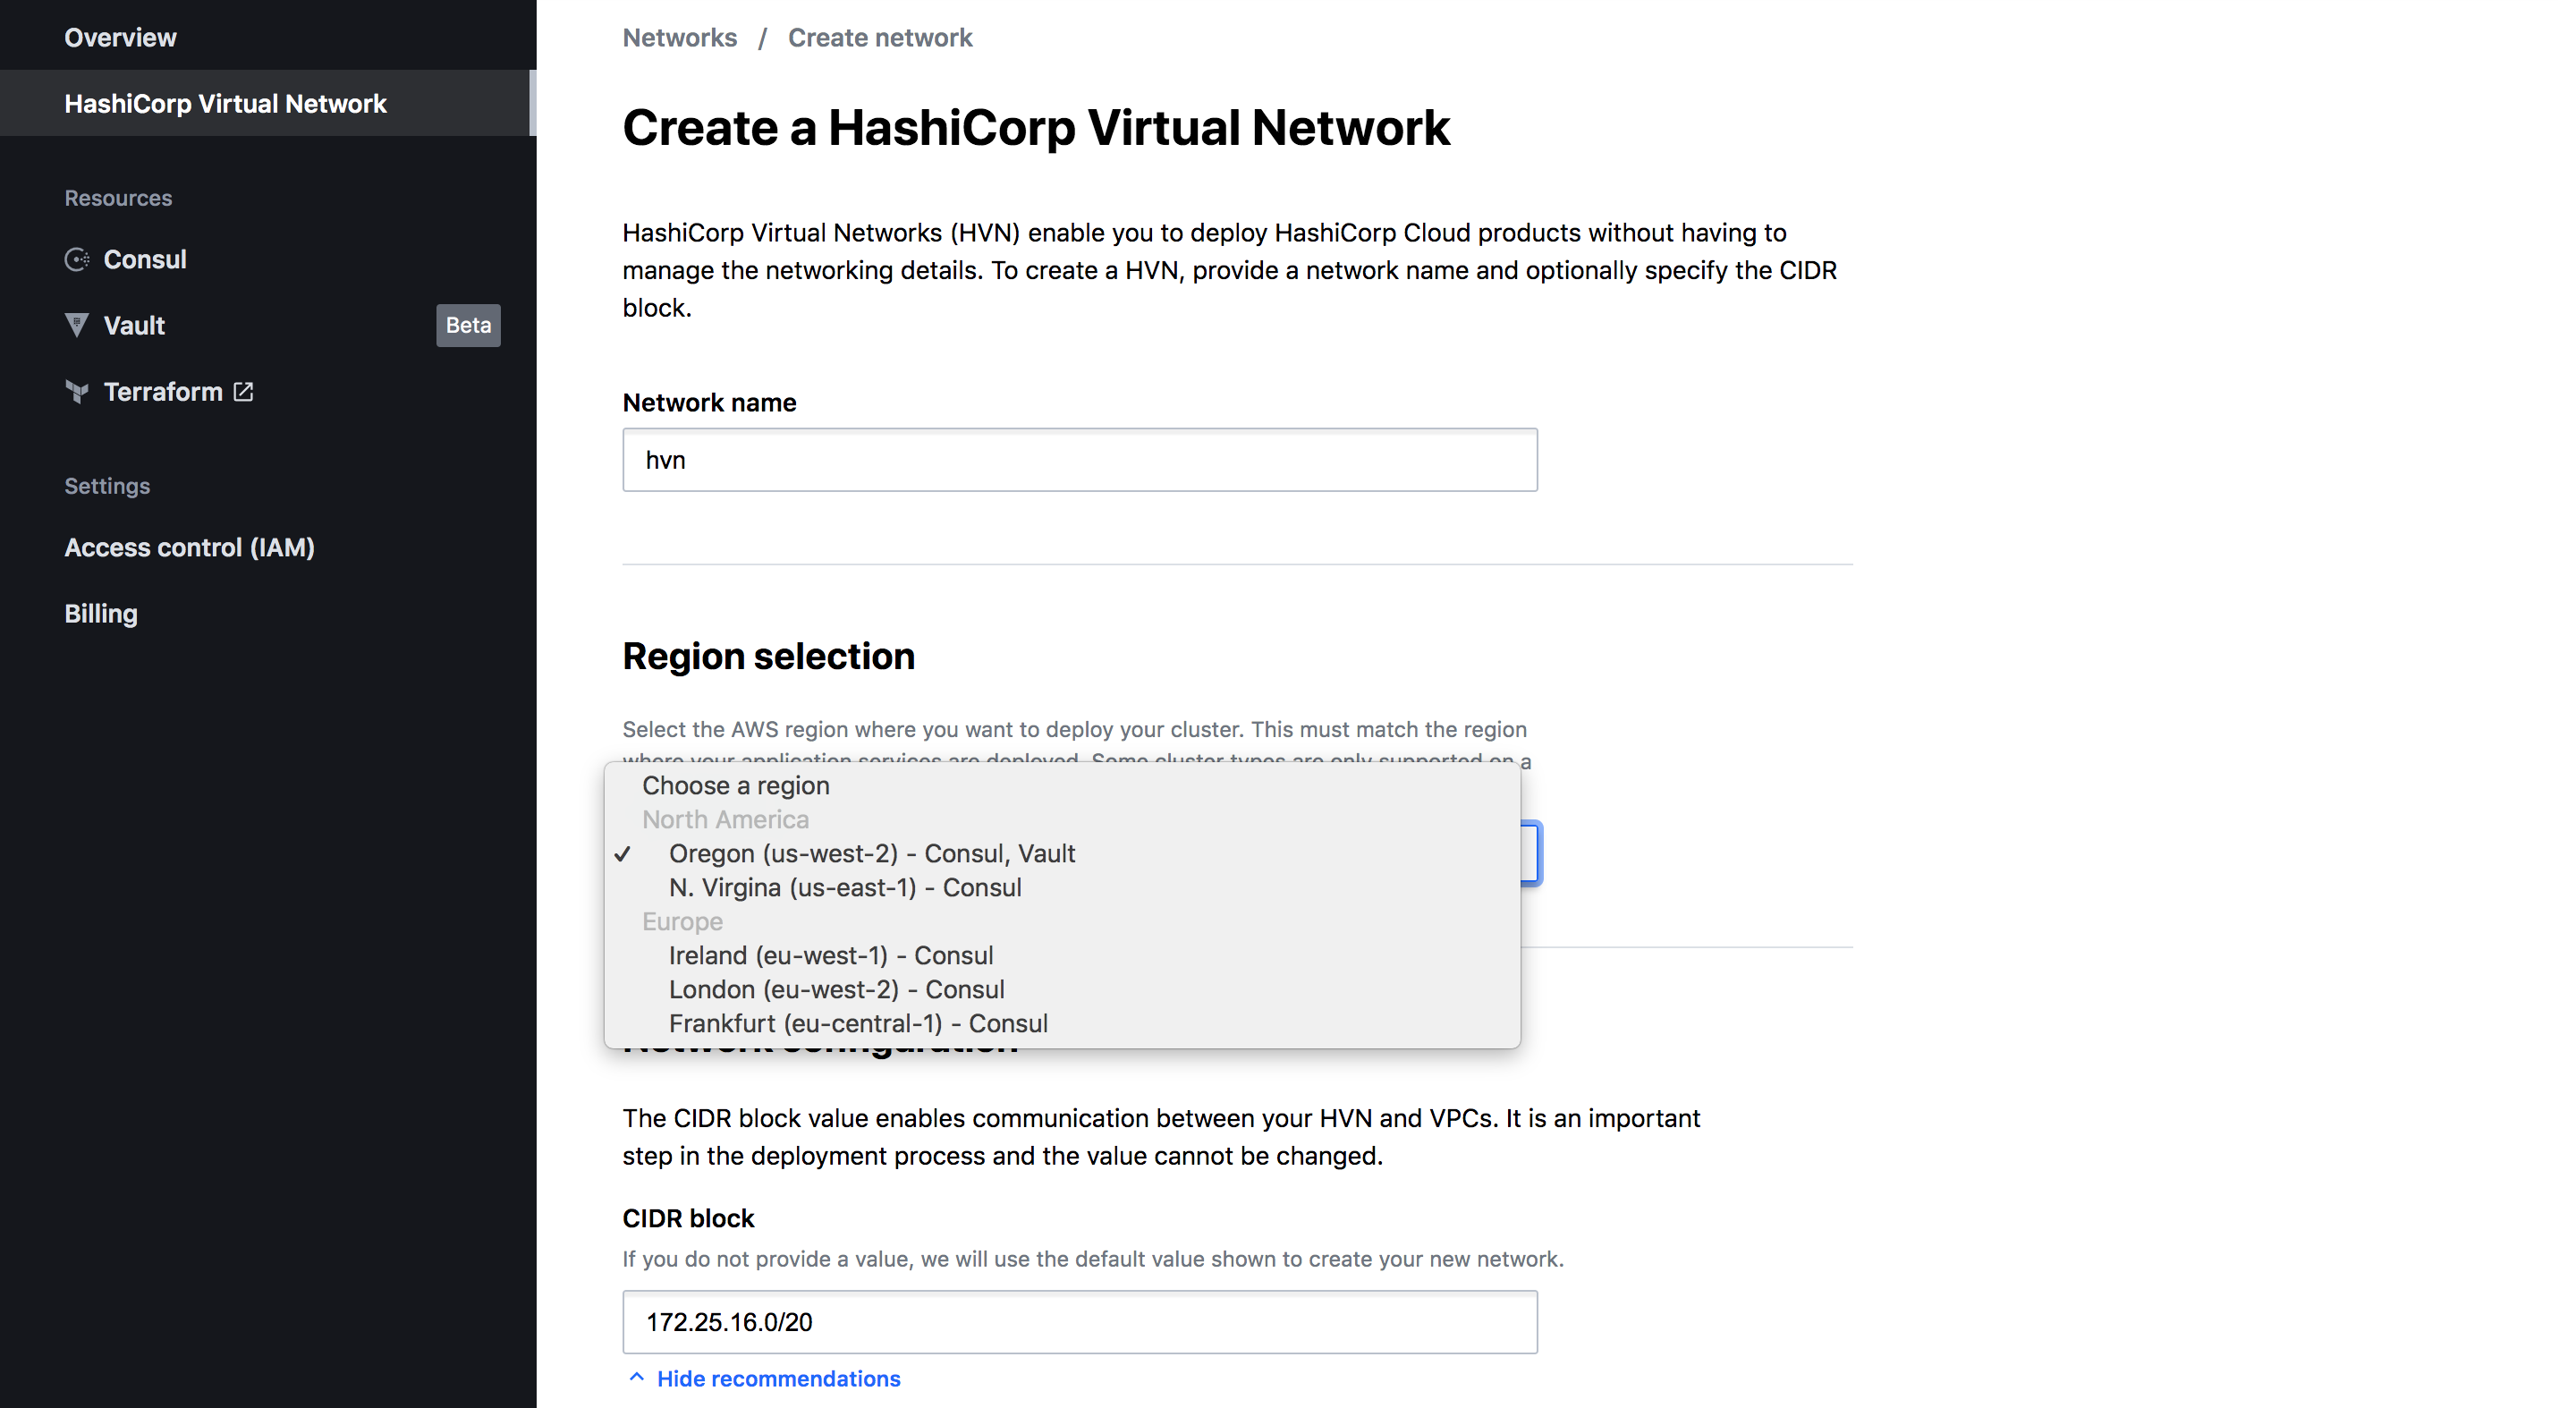
Next, we have to set up a Hashicorp Virtual Network. Our cluster will be deployed on AWS in one of the supported regions.
Select a region from which you have connectivity to your apps and services.
Pay attention to the CIDR block configuration. Verify that the CIDR blocks of your VPCs that you want to connect with the Vault Cluster aren’t overlapping.
The default HVN CIDR block value(172.25.16.0/20) does not overlap with the default CIDR block value for AWS VPCs (172.31.0.0/16).
However, if you are planning to use this HVN in production it’s better to think and design your network topology and provide a custom CIDR value.
For our demo, we are going to leave the defaults and go ahead click Create network.
That process might take some time, around 5 mins.
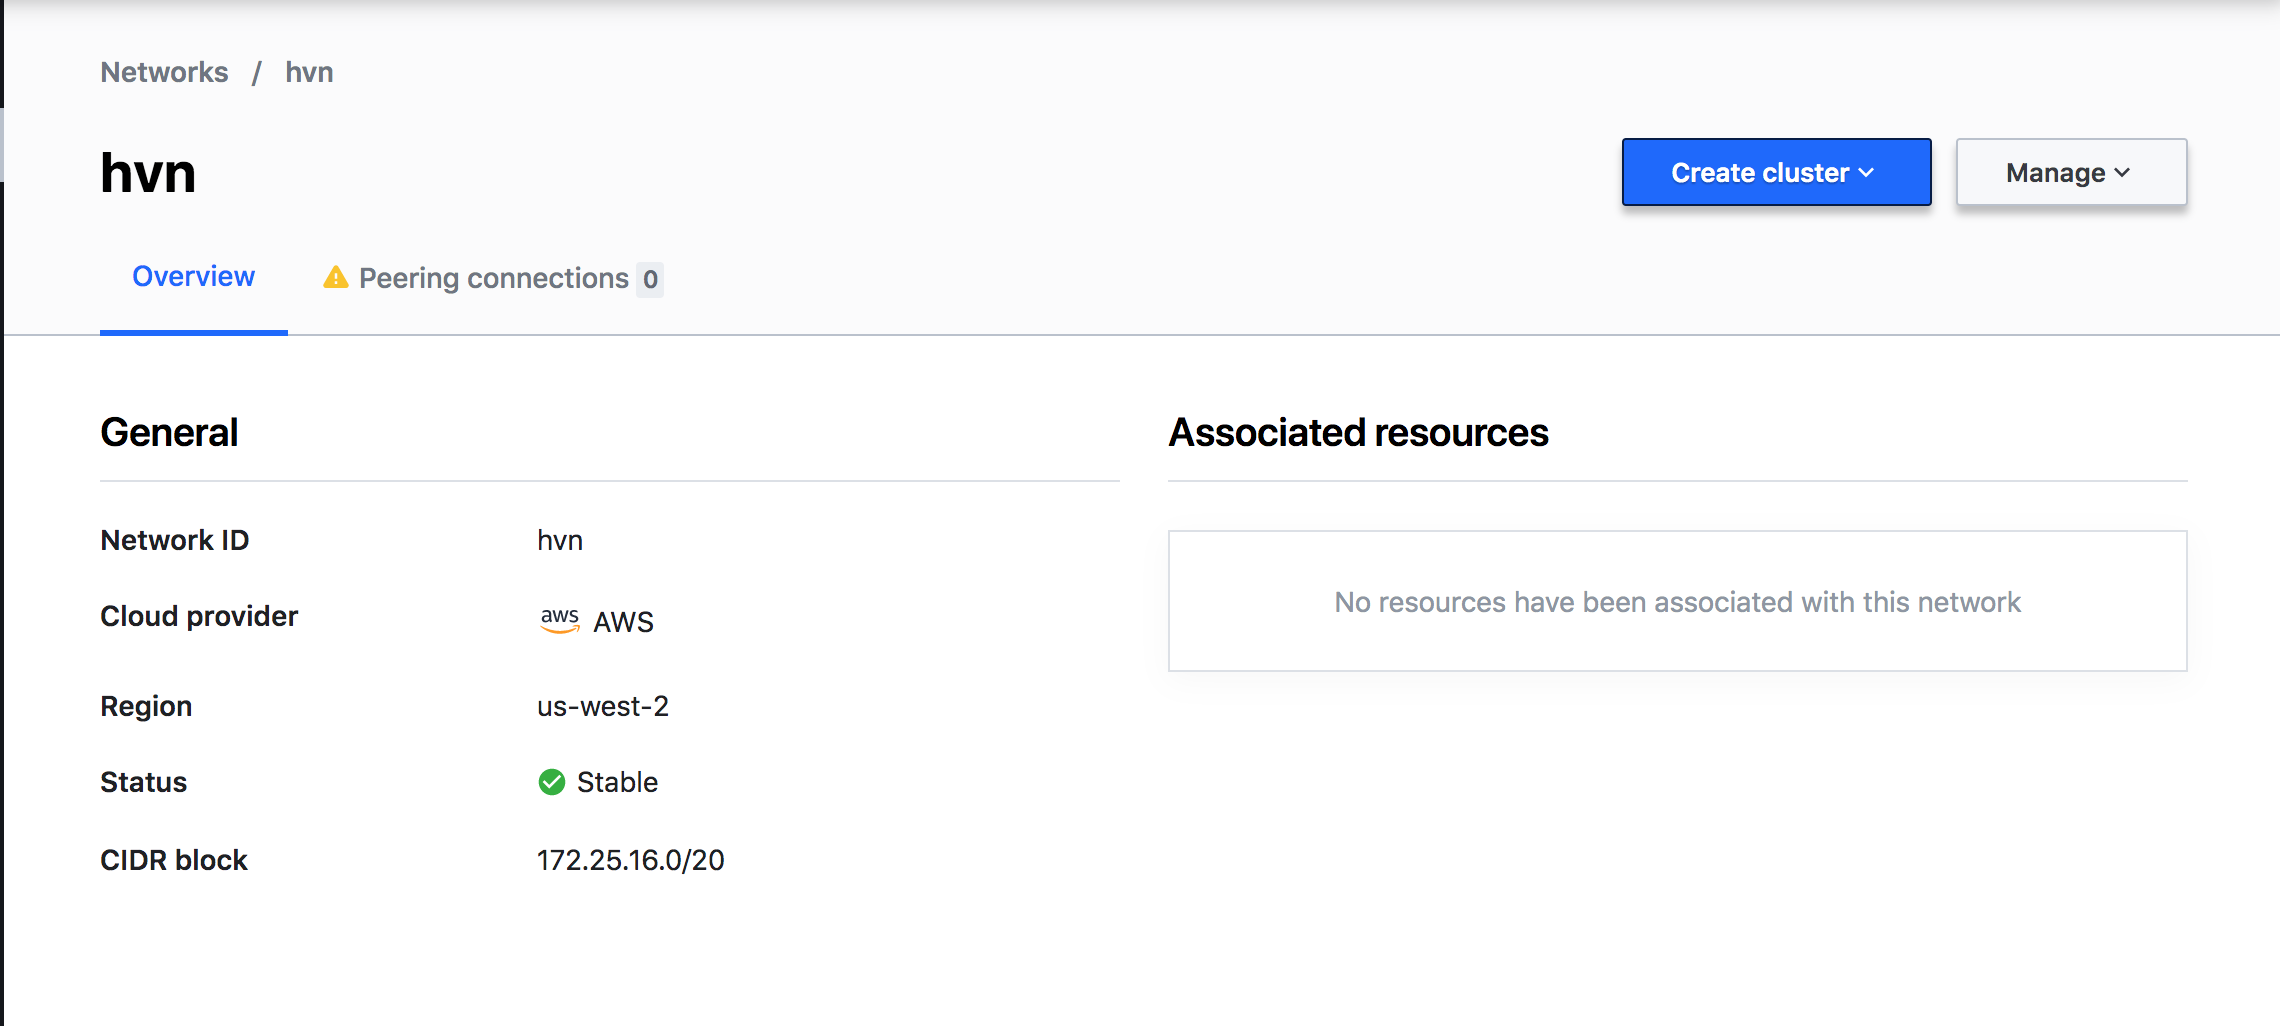
Nice, our network is ready. There is a very useful tab to create a VPC Peering Connection and enable resources access from your AWS VPC networks where you host your services and apps.
Looks like this:
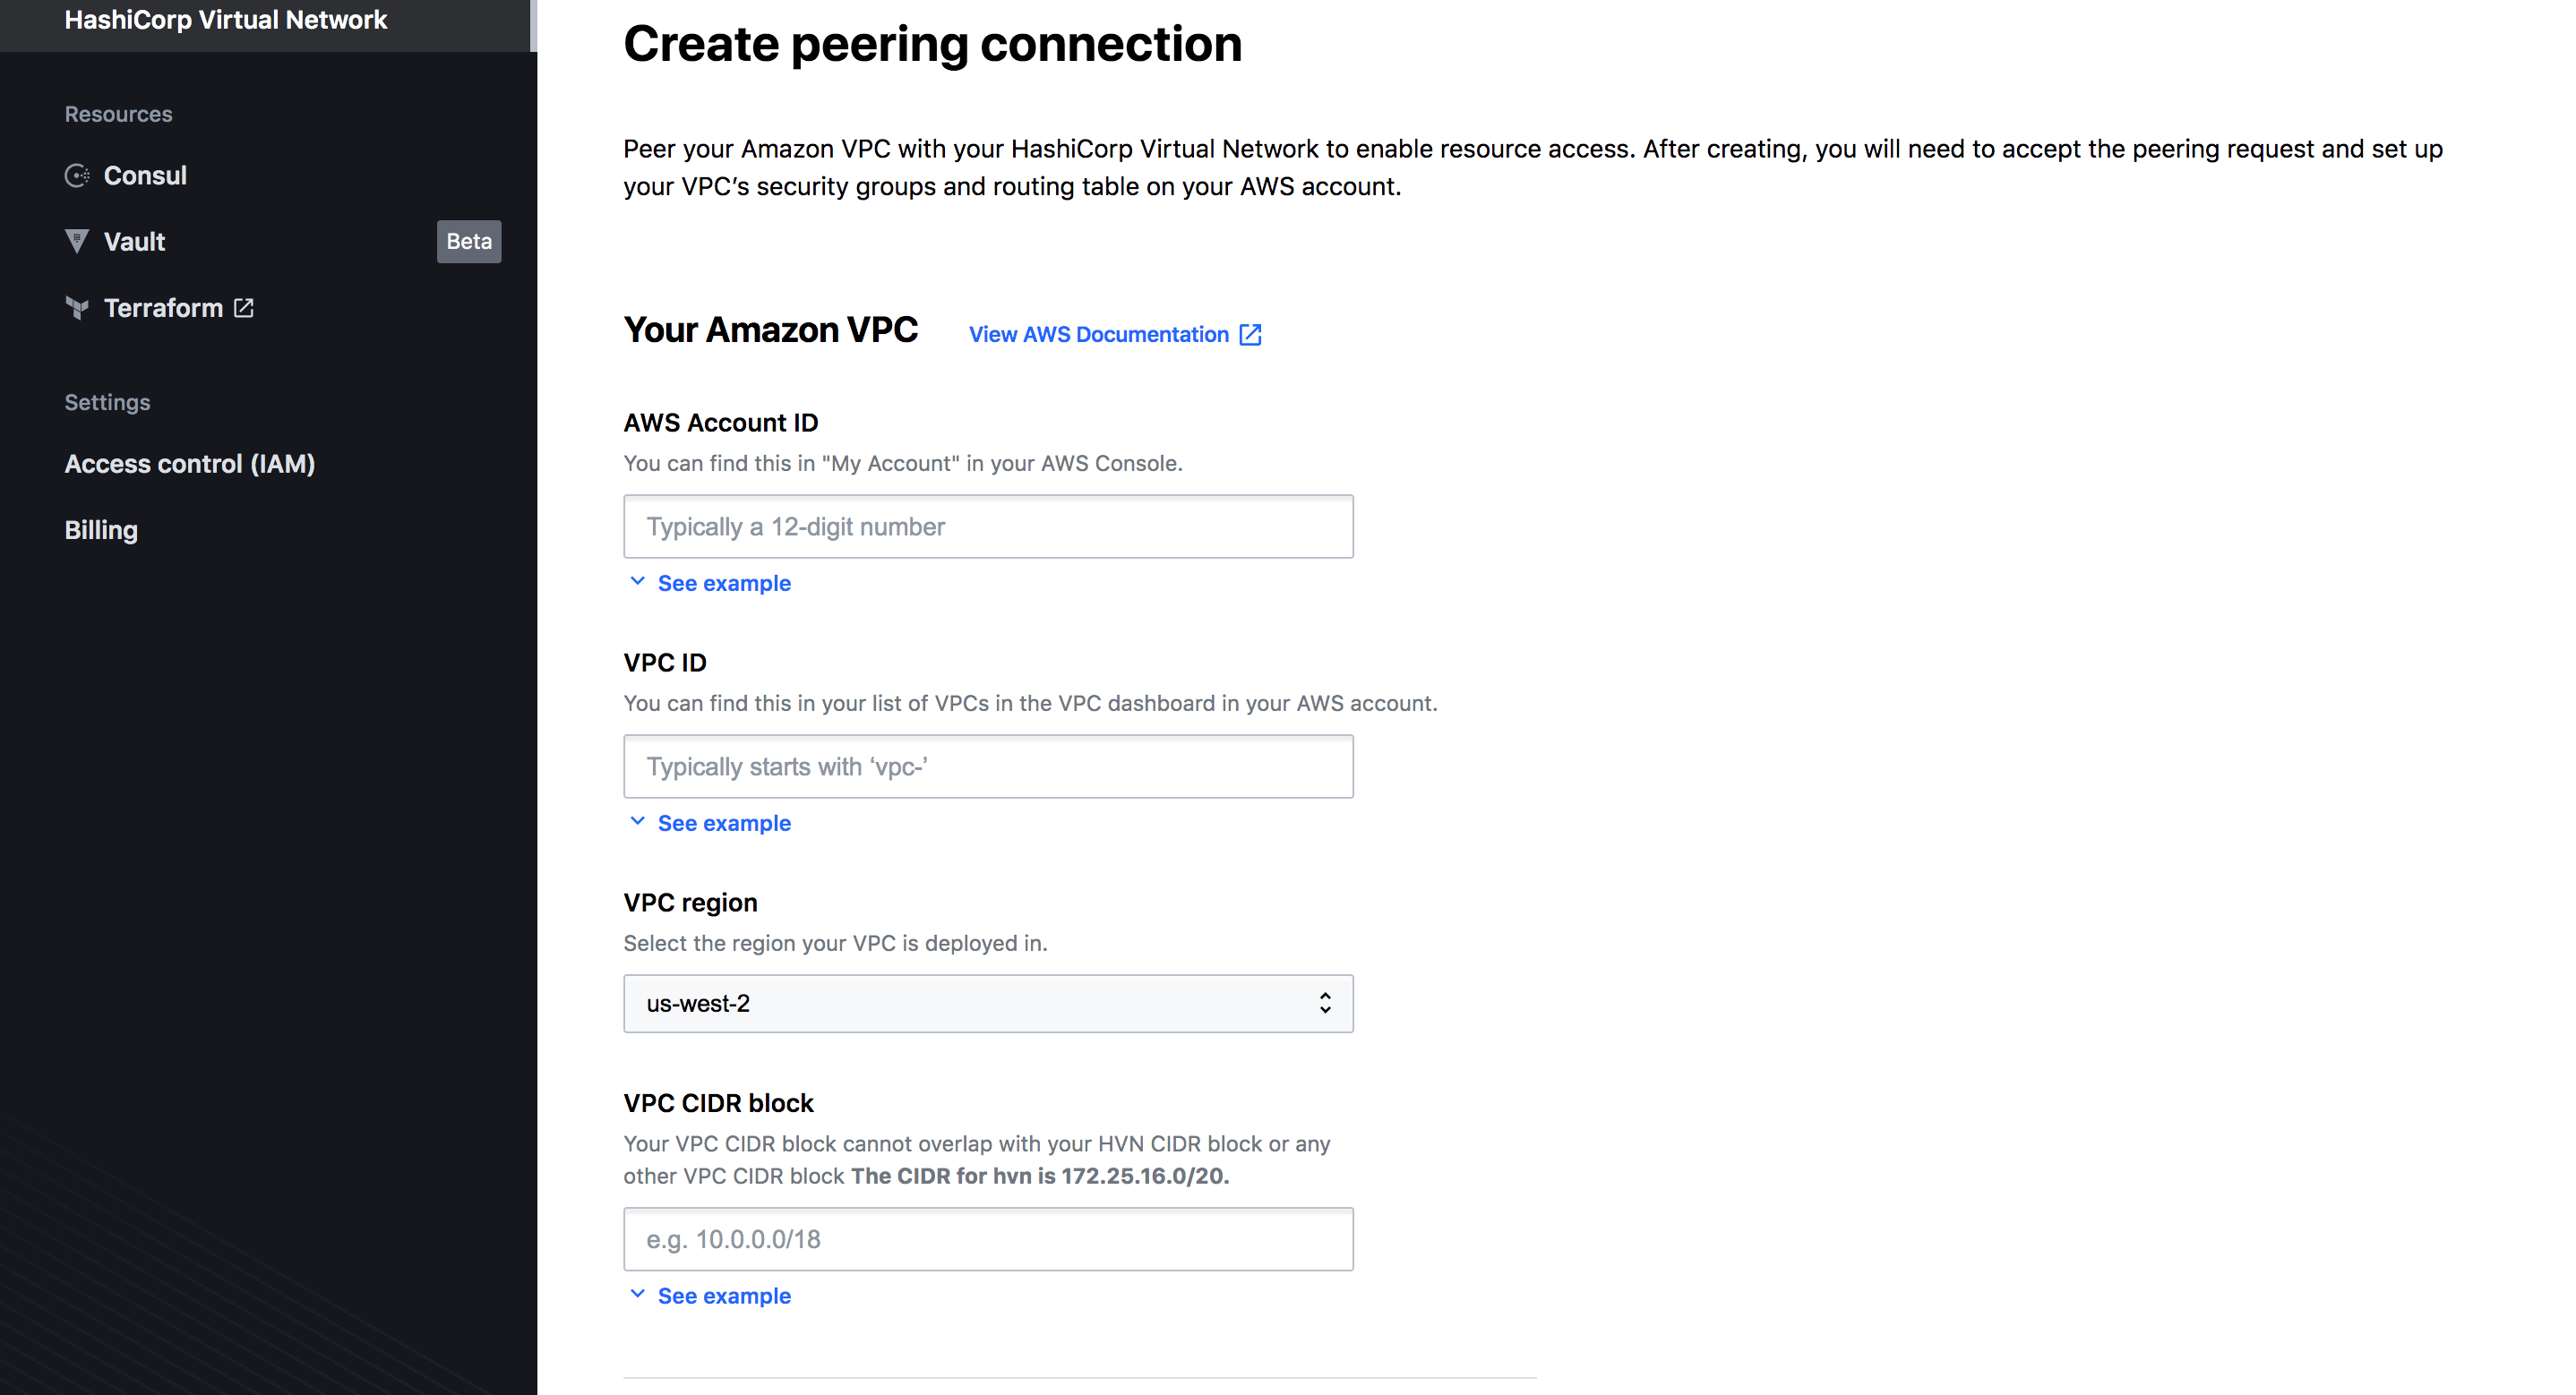
We are going to skip this step for now.
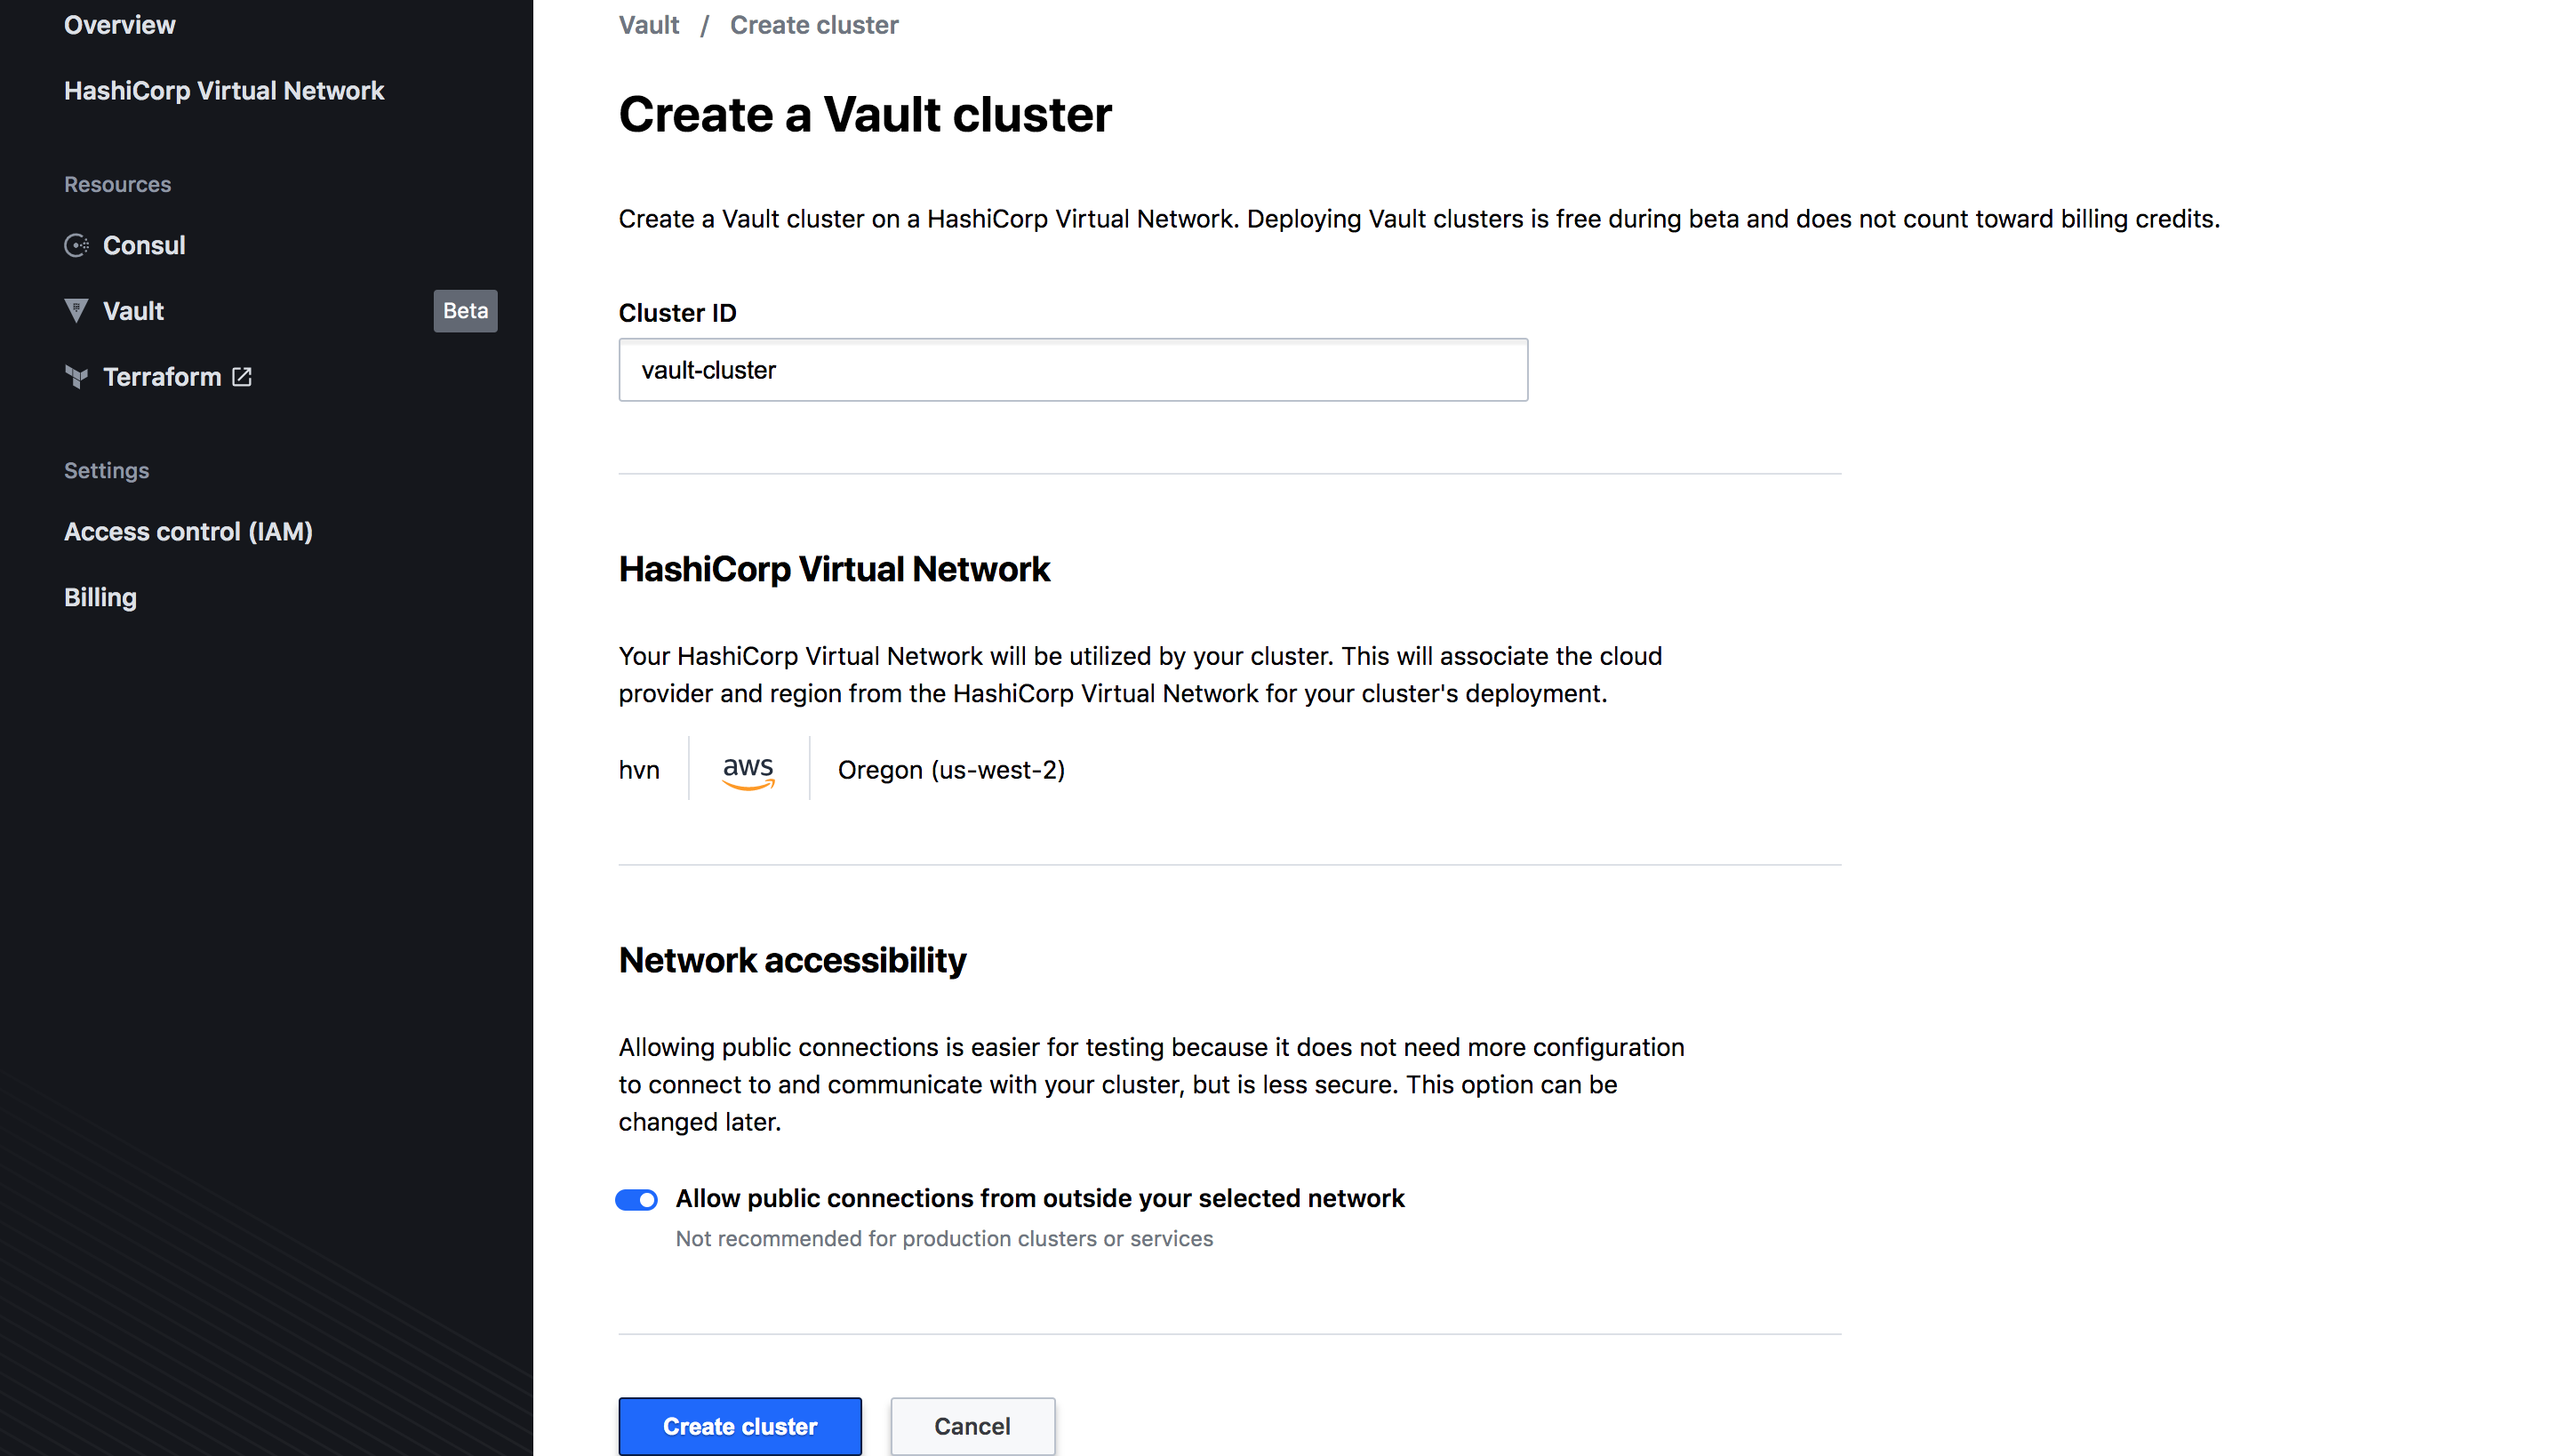
Next step, set up our Vault cluster! Since we are testing let’s allow public connections.
How easy was that? After 5-10 mins our Vault Cluster is ready!
Vault cluster overview
This is the overview page of our created Vault cluster configuration:

There are also tabs regarding our Snapshots & Cluster.
Access Cluster
Vault enables by default the token authentication method. To access our cluster we first have to select Generate token and copy the token.
Follow the Public access URL from the overview page and you should see a page like this:
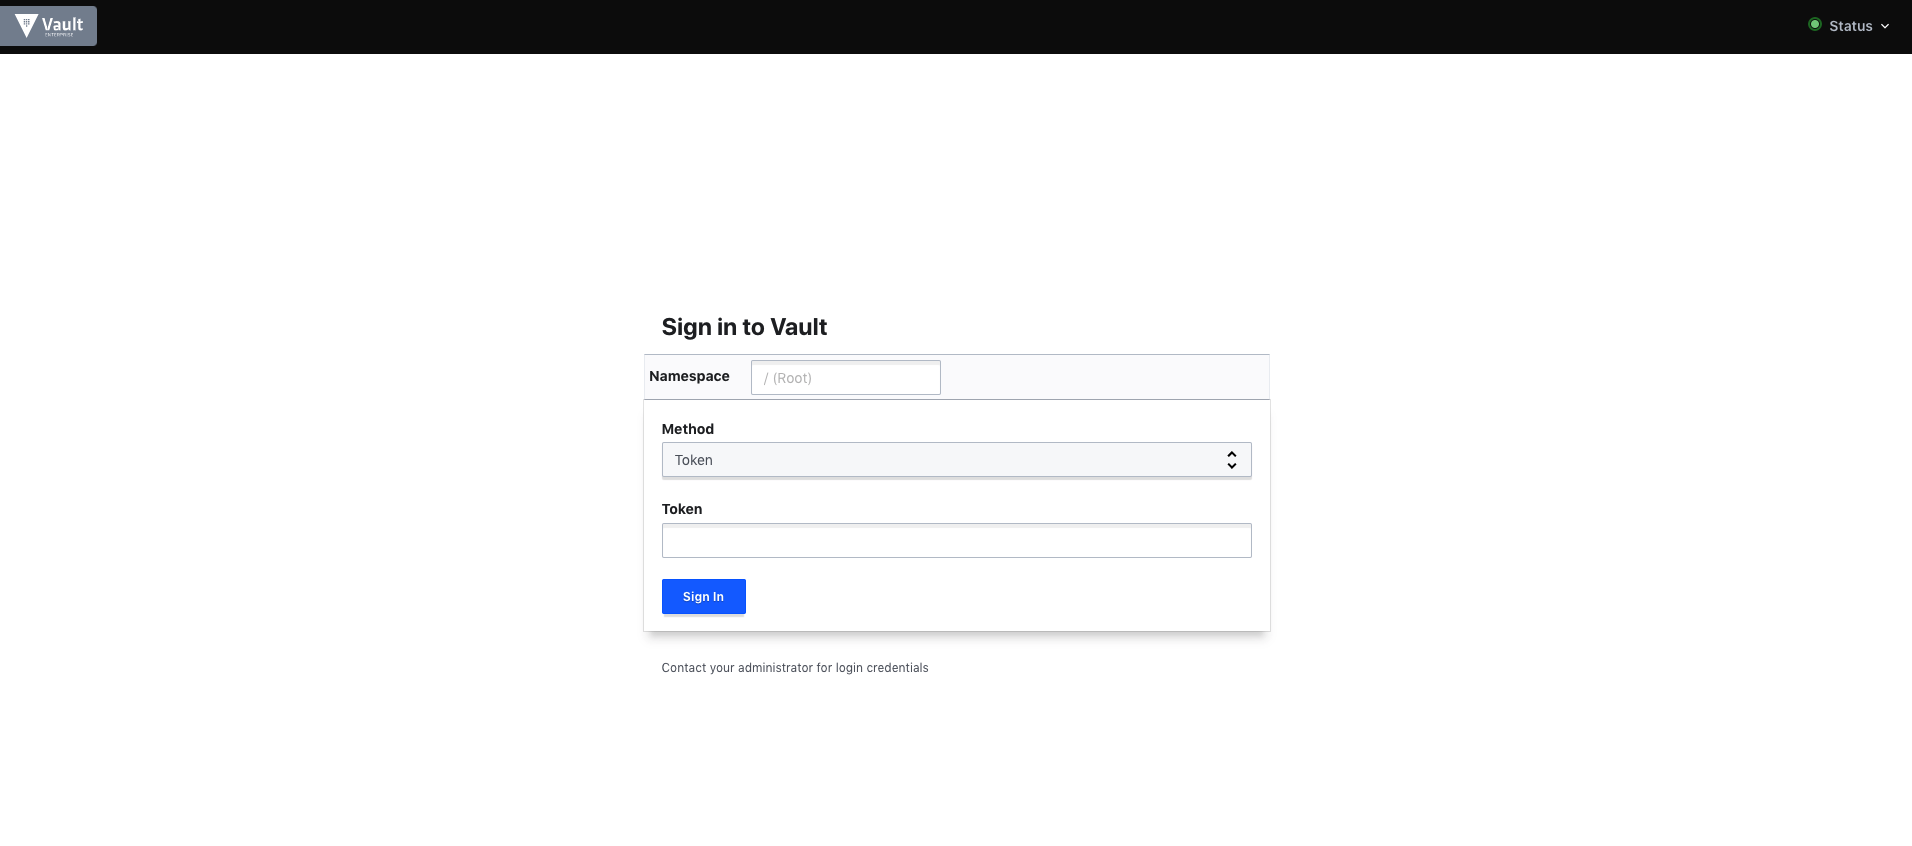
Use the token to log in. From here, everything is pretty much the same as a self-hosted Vault cluster.
Namespaces & Multi-tenanncy
A Vault namespace essentially provides a dedicated and isolated Vault environment. This way we can scale Vault to many teams across an organization. Each namespace has its own secrets engines, policies, auth methods, tokens, etc.
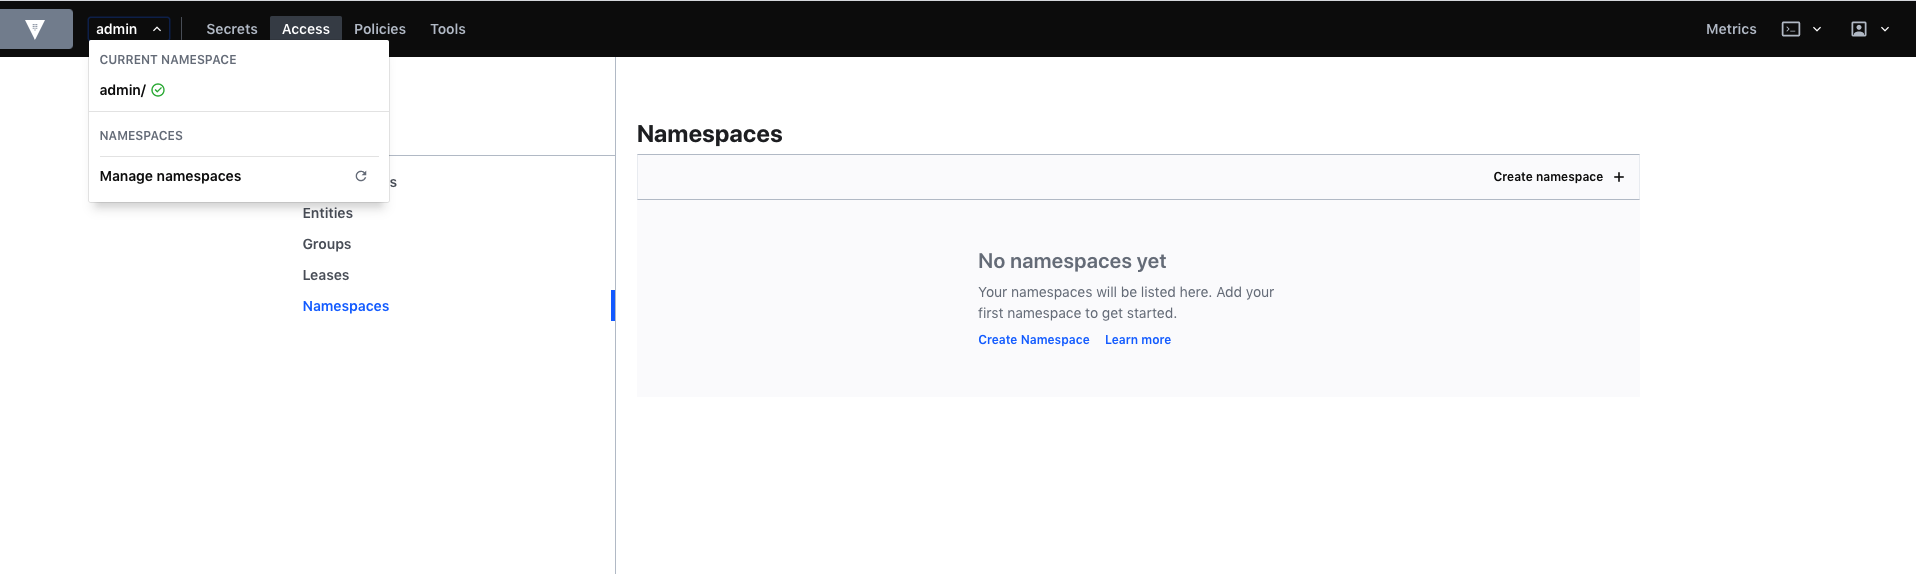
By default, when we set up a cluster with HCP we get an admin namespace.
To create or add a new namespace you can click on the admin dropdown top left.
Let’s perform some basic initialization tasks.
Vault setup
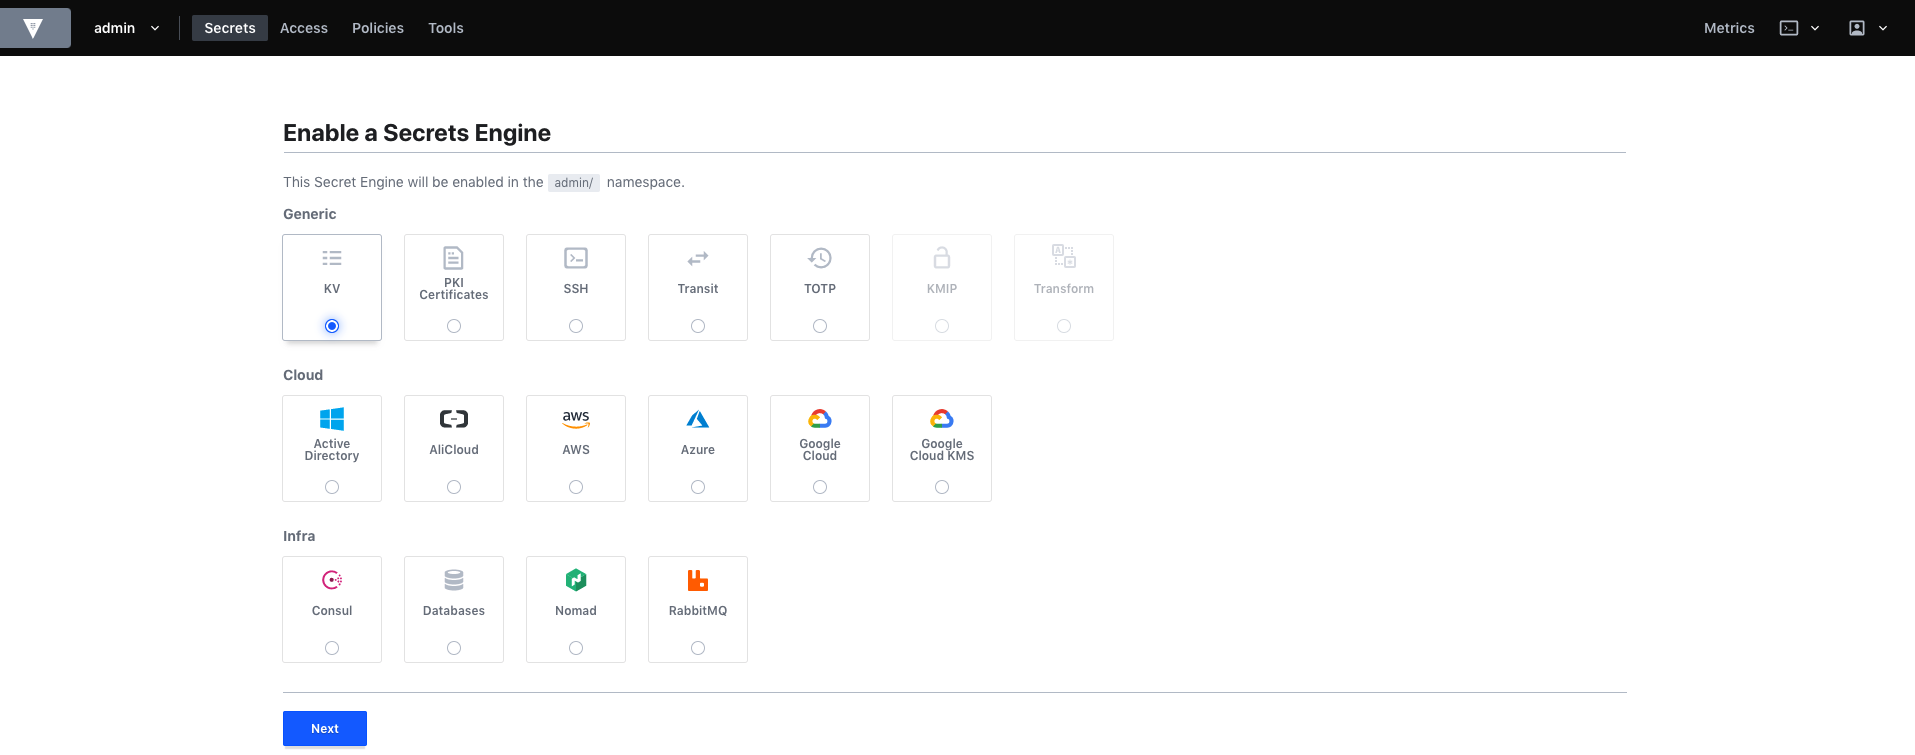
First, let’s enable a Secrets Engine. Secrets engines are components that store, generate, or encrypt data and they are enabled at a “path” in Vault.
For our example, we are going to create a simple Key/Value engine to store arbitrary secrets.
Select Secrets and Enable new engine.
For the configuration, specify the path that you want to use for your Secret Engine.
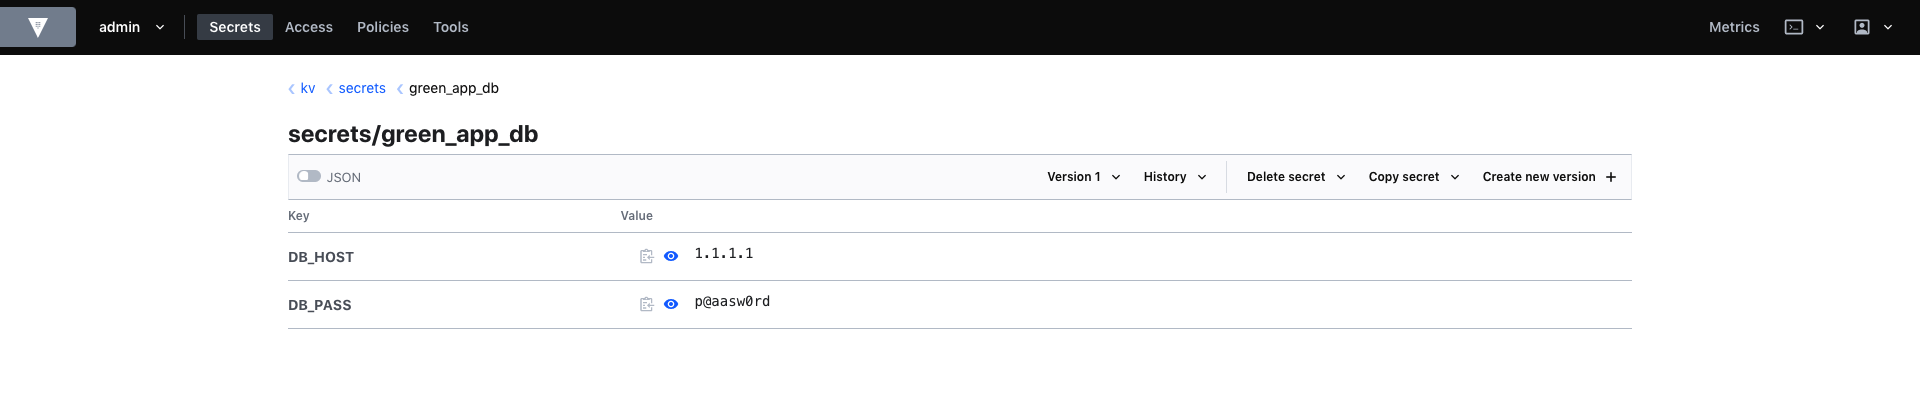
Alright next step, create a dummy secret green_app_db in our new Secret Engine.
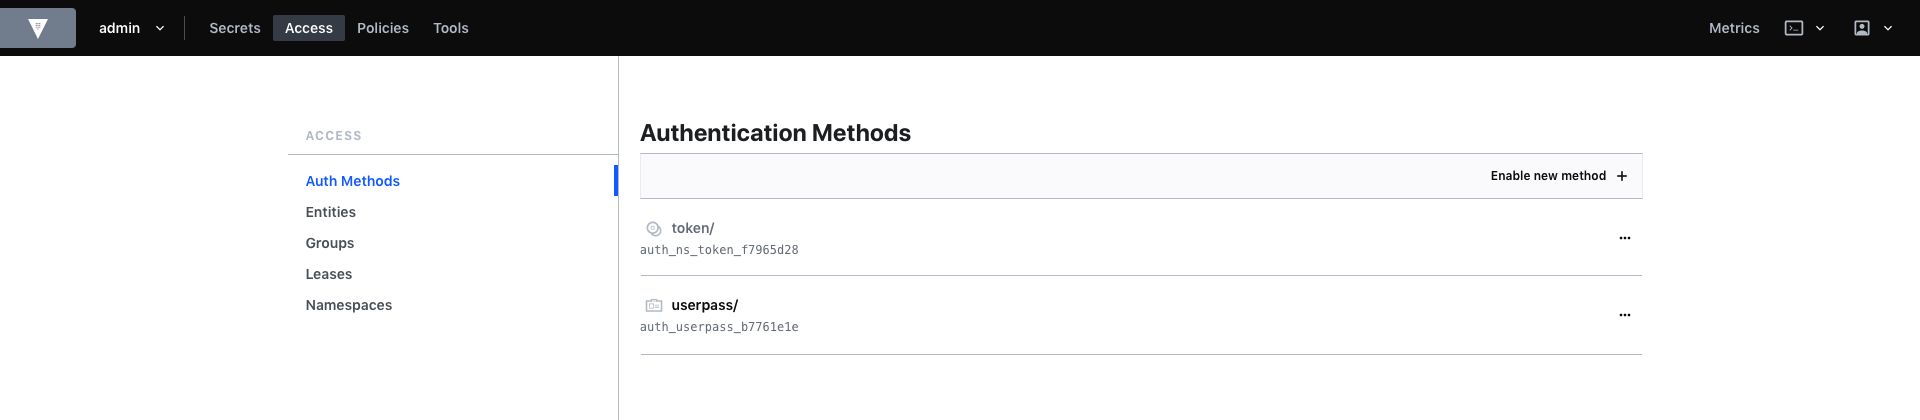
Cool, let’s move to Access/Auth Methods and enable the userpass auth method. We’ll create later a green_app_dev user to test access to our secret based on a green_app policy.
Let’s create a policy to allow our user green_app_dev to access our green_app_db secret. We would like our green_app_dev user to be able to access the green_app_db secret but not another secret, super_secret for example.
Navigate to Policies & select Create ACL policy
Then let’s define the above rules we defined. Allow our user to list all our secrets, be able to read the green_app_db secret but deny access to super_secret.
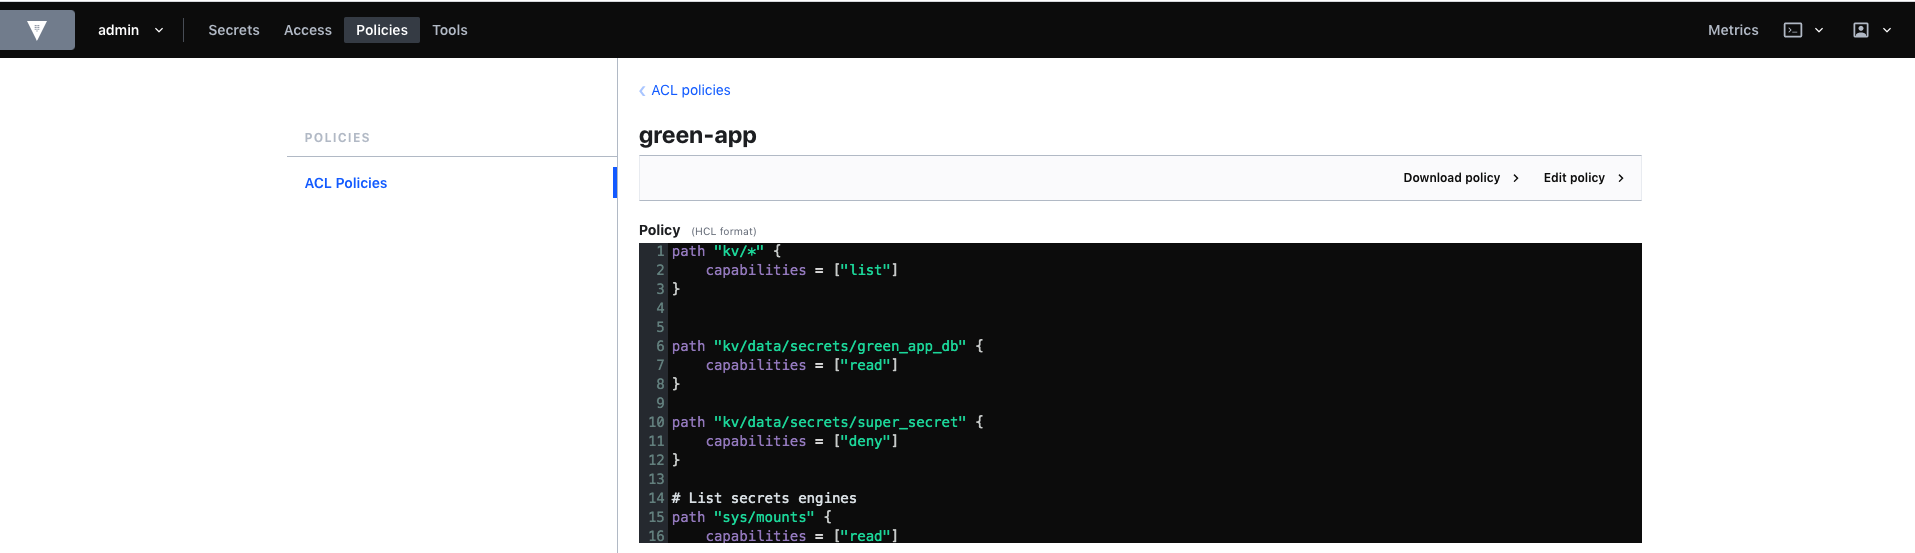
Using HCL format:
path "kv/*" {
    capabilities = ["list"]
}


path "kv/data/secrets/green_app_db" {
    capabilities = ["read"]
}

path "kv/data/secrets/super_secret" {
    capabilities = ["deny"]
}

# List secrets engines
path "sys/mounts" {
    capabilities = ["read"]
}
To check more info on how to define your policies correctly check this.
Last thing to create our user and associate him with the policy. We can do that with the CLI window that exists on the top-right part of the platform.
Select it and you get a Vault CLI pop-up that can help to perform basic operational tasks.
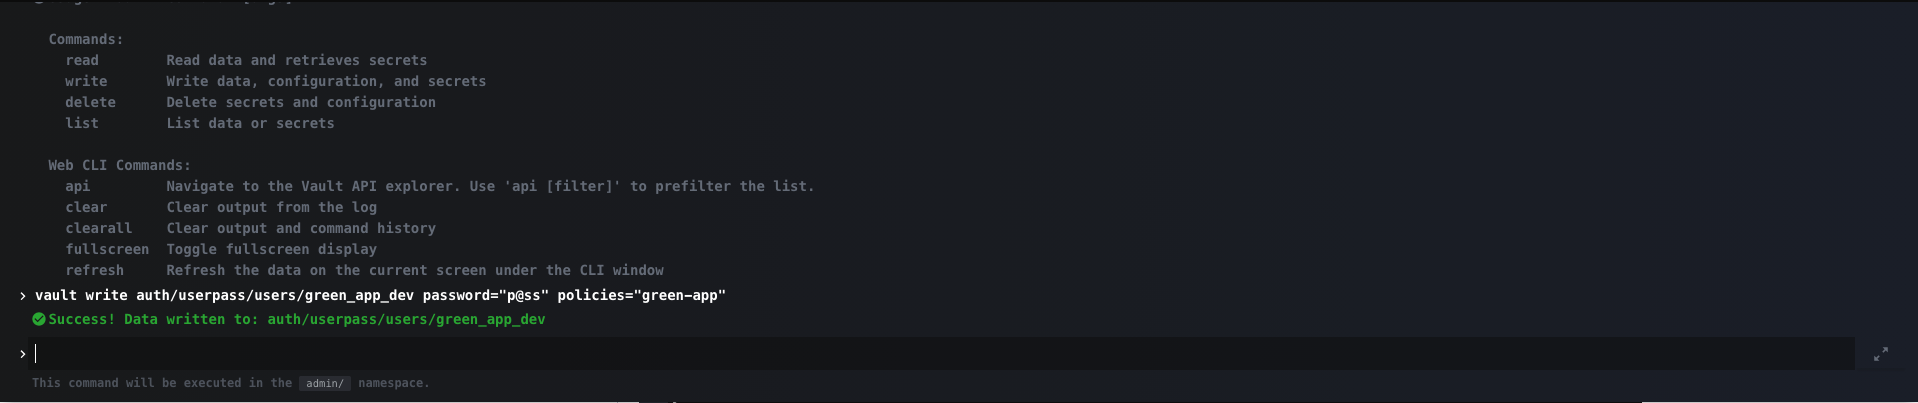
In our case:
vault write auth/userpass/users/green_app_dev password="p@ss" policies="green-app"
Perfect, to test this policy we log in to Vault with this newly created user.
Select the /admin namespace and Username as the method

After we log in as green_app_dev user we can verify that we can list all secrets of our kv engine, we can access the green_app_db secret, but when we try to access the super_secret we get Not Authorized error.

HCP Vault Ops Tasks
Hashicorp Cloud Platform also simplifies some other operational tasks for our Vault cluster. For example, we can use HCP to Seal or Unseal our cluster.

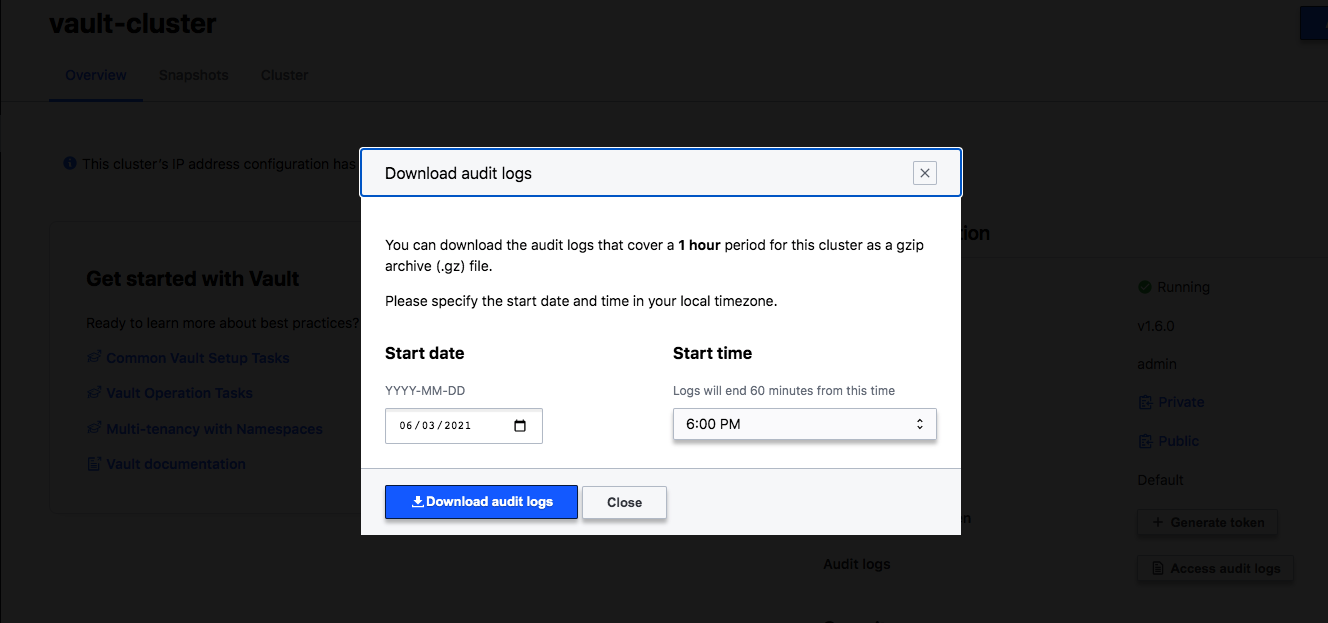
We can also access and download the audit log for troubleshooting.
Data snapshots are also automated with HCP and by checking the Snapshots tab, we see that automated periodic snapshots are enabled by default.
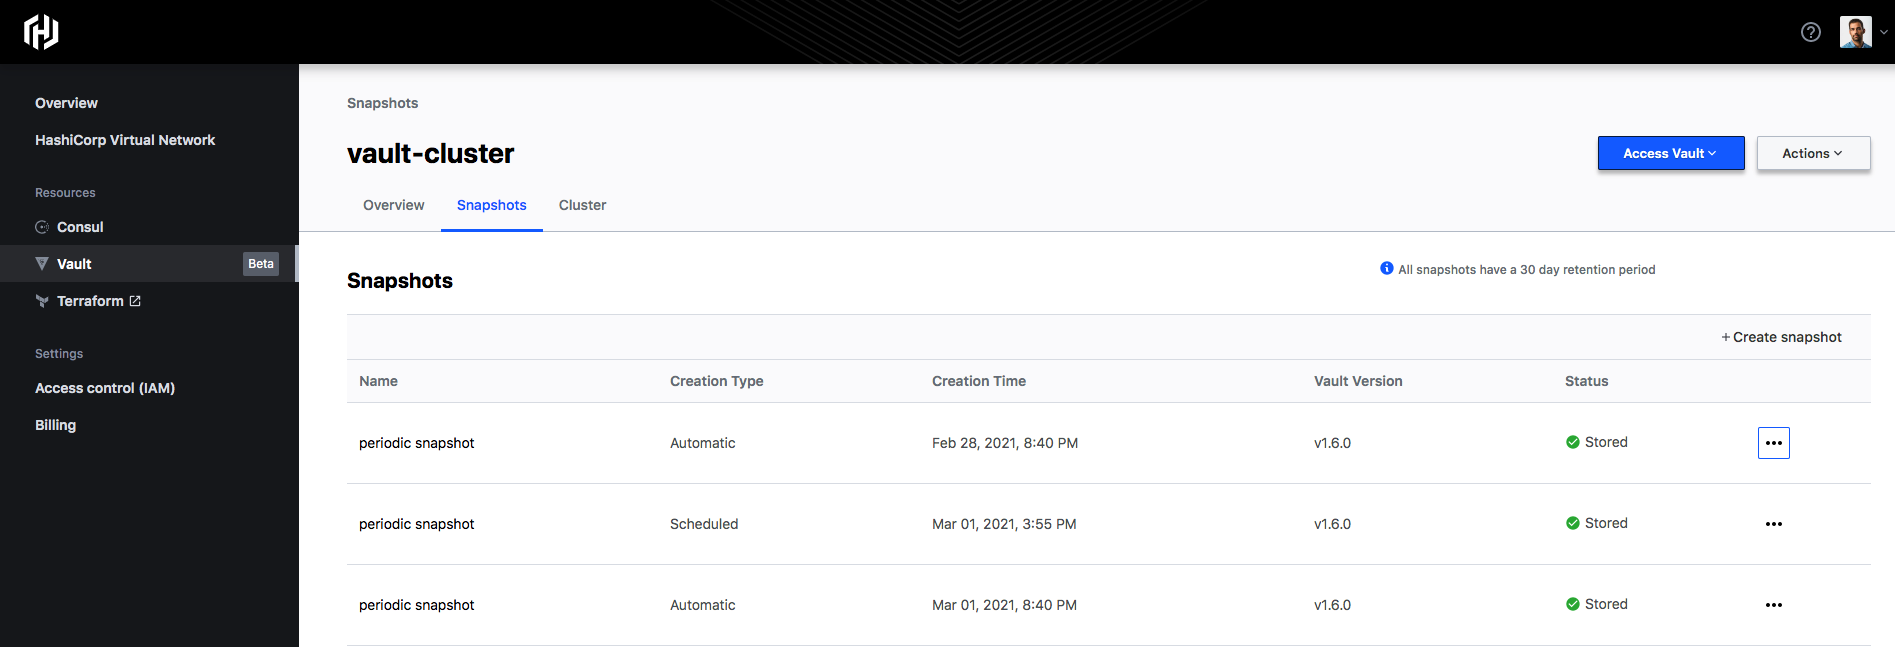
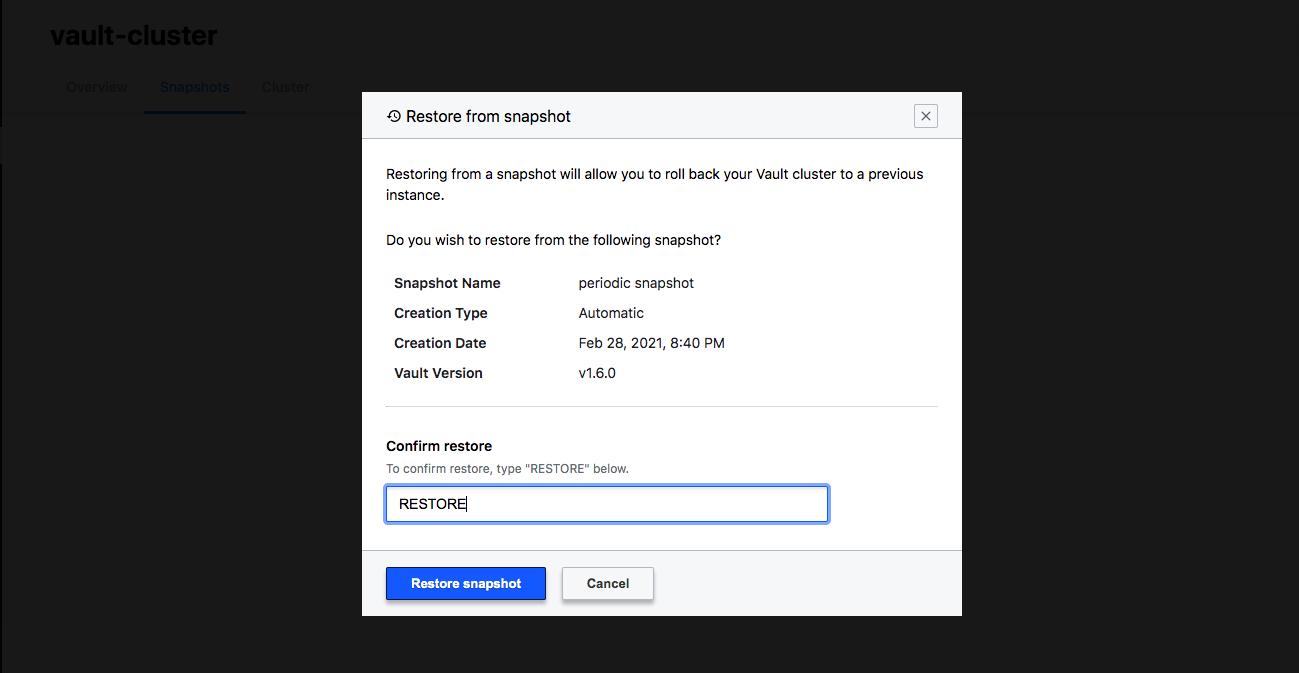
On this page, we can select Create a new snapshot or Restore from snapshot in case of issues.
That’s all folks, hope you enjoyed this. We explored Hashicorp Cloud Platform and saw how we can set up a Vault Cluster in minutes, off-loading most of the operational overhead of Vault’s maintenance to HCP.